Before and After: A Small Kitchen Makeover on a Budget. In collaboration with Valspar Paint UK & For The Floor And More [Ad - gifted items]
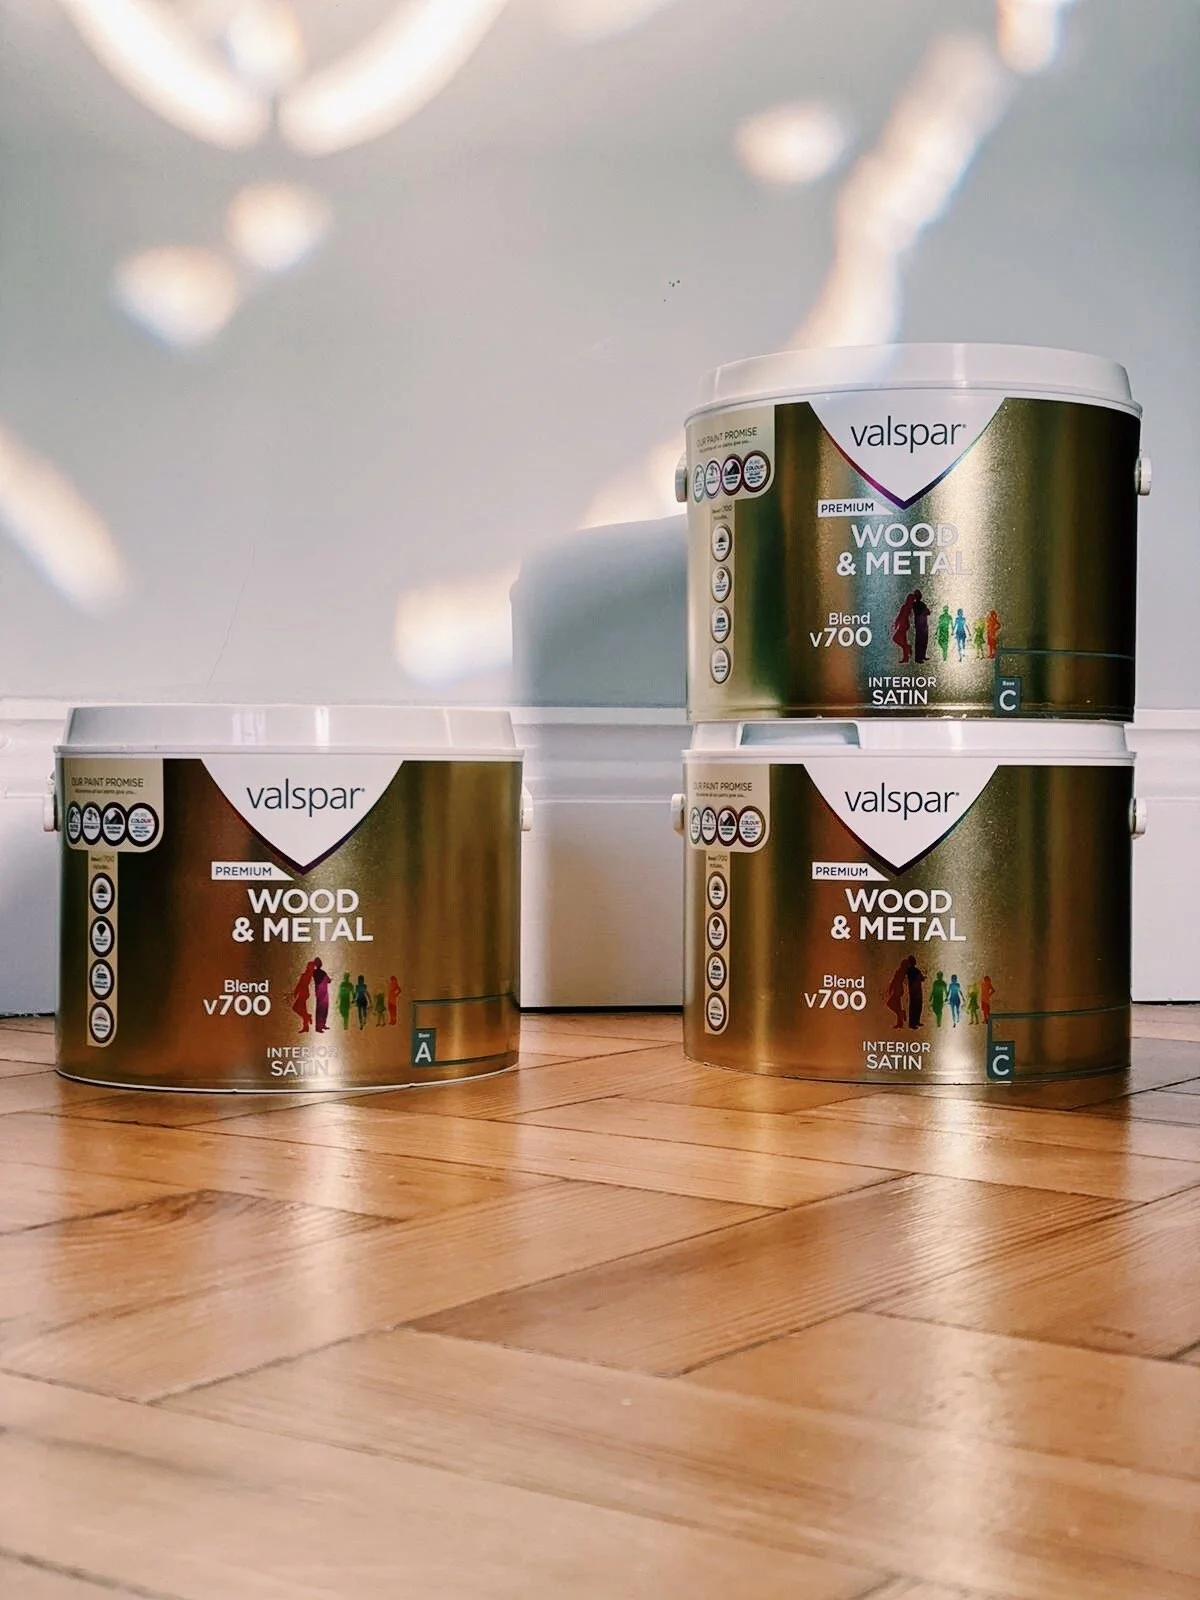
V700 Premium blend wood & metal paint (in pre-selected colours) Pond Frost & Grey Shingle
If you need some ideas for a small kitchen makeover on a budget, here’s how you can spruce up your kitchen, without breaking the bank. If you’re at home with more time on your hands than you can currently shake a stick at (and can muster up the money and energy to do so) you might try tackling those ‘I’ll get round to it one day” type of home DIY tasks. Believe me, it’s definitely one way that you can get a creative fix, burn off some boredom and make your surroundings a little more pleasant at the same time.
For many of us, we don’t have the luxury (read as: cash money) to splash out £5,000 - £50,000 on a home renovation, or - in this case - a completely new kitchen. However, if you are lusting after a kitchen update but can’t afford to buy a brand new one, fear not! There’s still a lot you can do!
Ok, so whilst this is obviously much cheaper than getting a professional in to do you a new kitchen, it does requires a bit of graft on your part.
Warning – a long read, but (hopefully) very helpful kitchen makeover blog post.
For me, any home makeover starts with Pinterest. I always like to create a brand new board for the home DIY project in mind, and gather visual inspiration, interior design tips and hacks (aka pins) from across the internet. By gathering as many ideas (known as ‘pins’) as possible in one place, you will find it easier to look and see what themes are starting to emerge. For me, I knew that I kept being drawn to two-tone kitchen cabinets, in fifty shades of grey. Joke! It was only two.
We were kindly gifted vouchers by the team at Valspar Paint, to re paint our kitchen cupboards. We needed a couple of pots of their V700 Premium blend wood & metal paint (in pre-selected colours) note: there are 2000+ to choose from!) and we were able to pick it up from our nearest B&Q store.
As you begin your search, you might find that you are drawn to a particular colour palette or style of kitchen. Maybe it’s a clean, white Scandi kitchen? Maybe it’s ultra modern minimal one with no handles… or maybe it’s something a little more wholesome and farmhouse-y. Whatever your preferred style, doing research online beforehand, is a great tactic for finding cheaper ways to get the type of kitchen you’re after, without spending as much money.
Before shots of the kitchen…
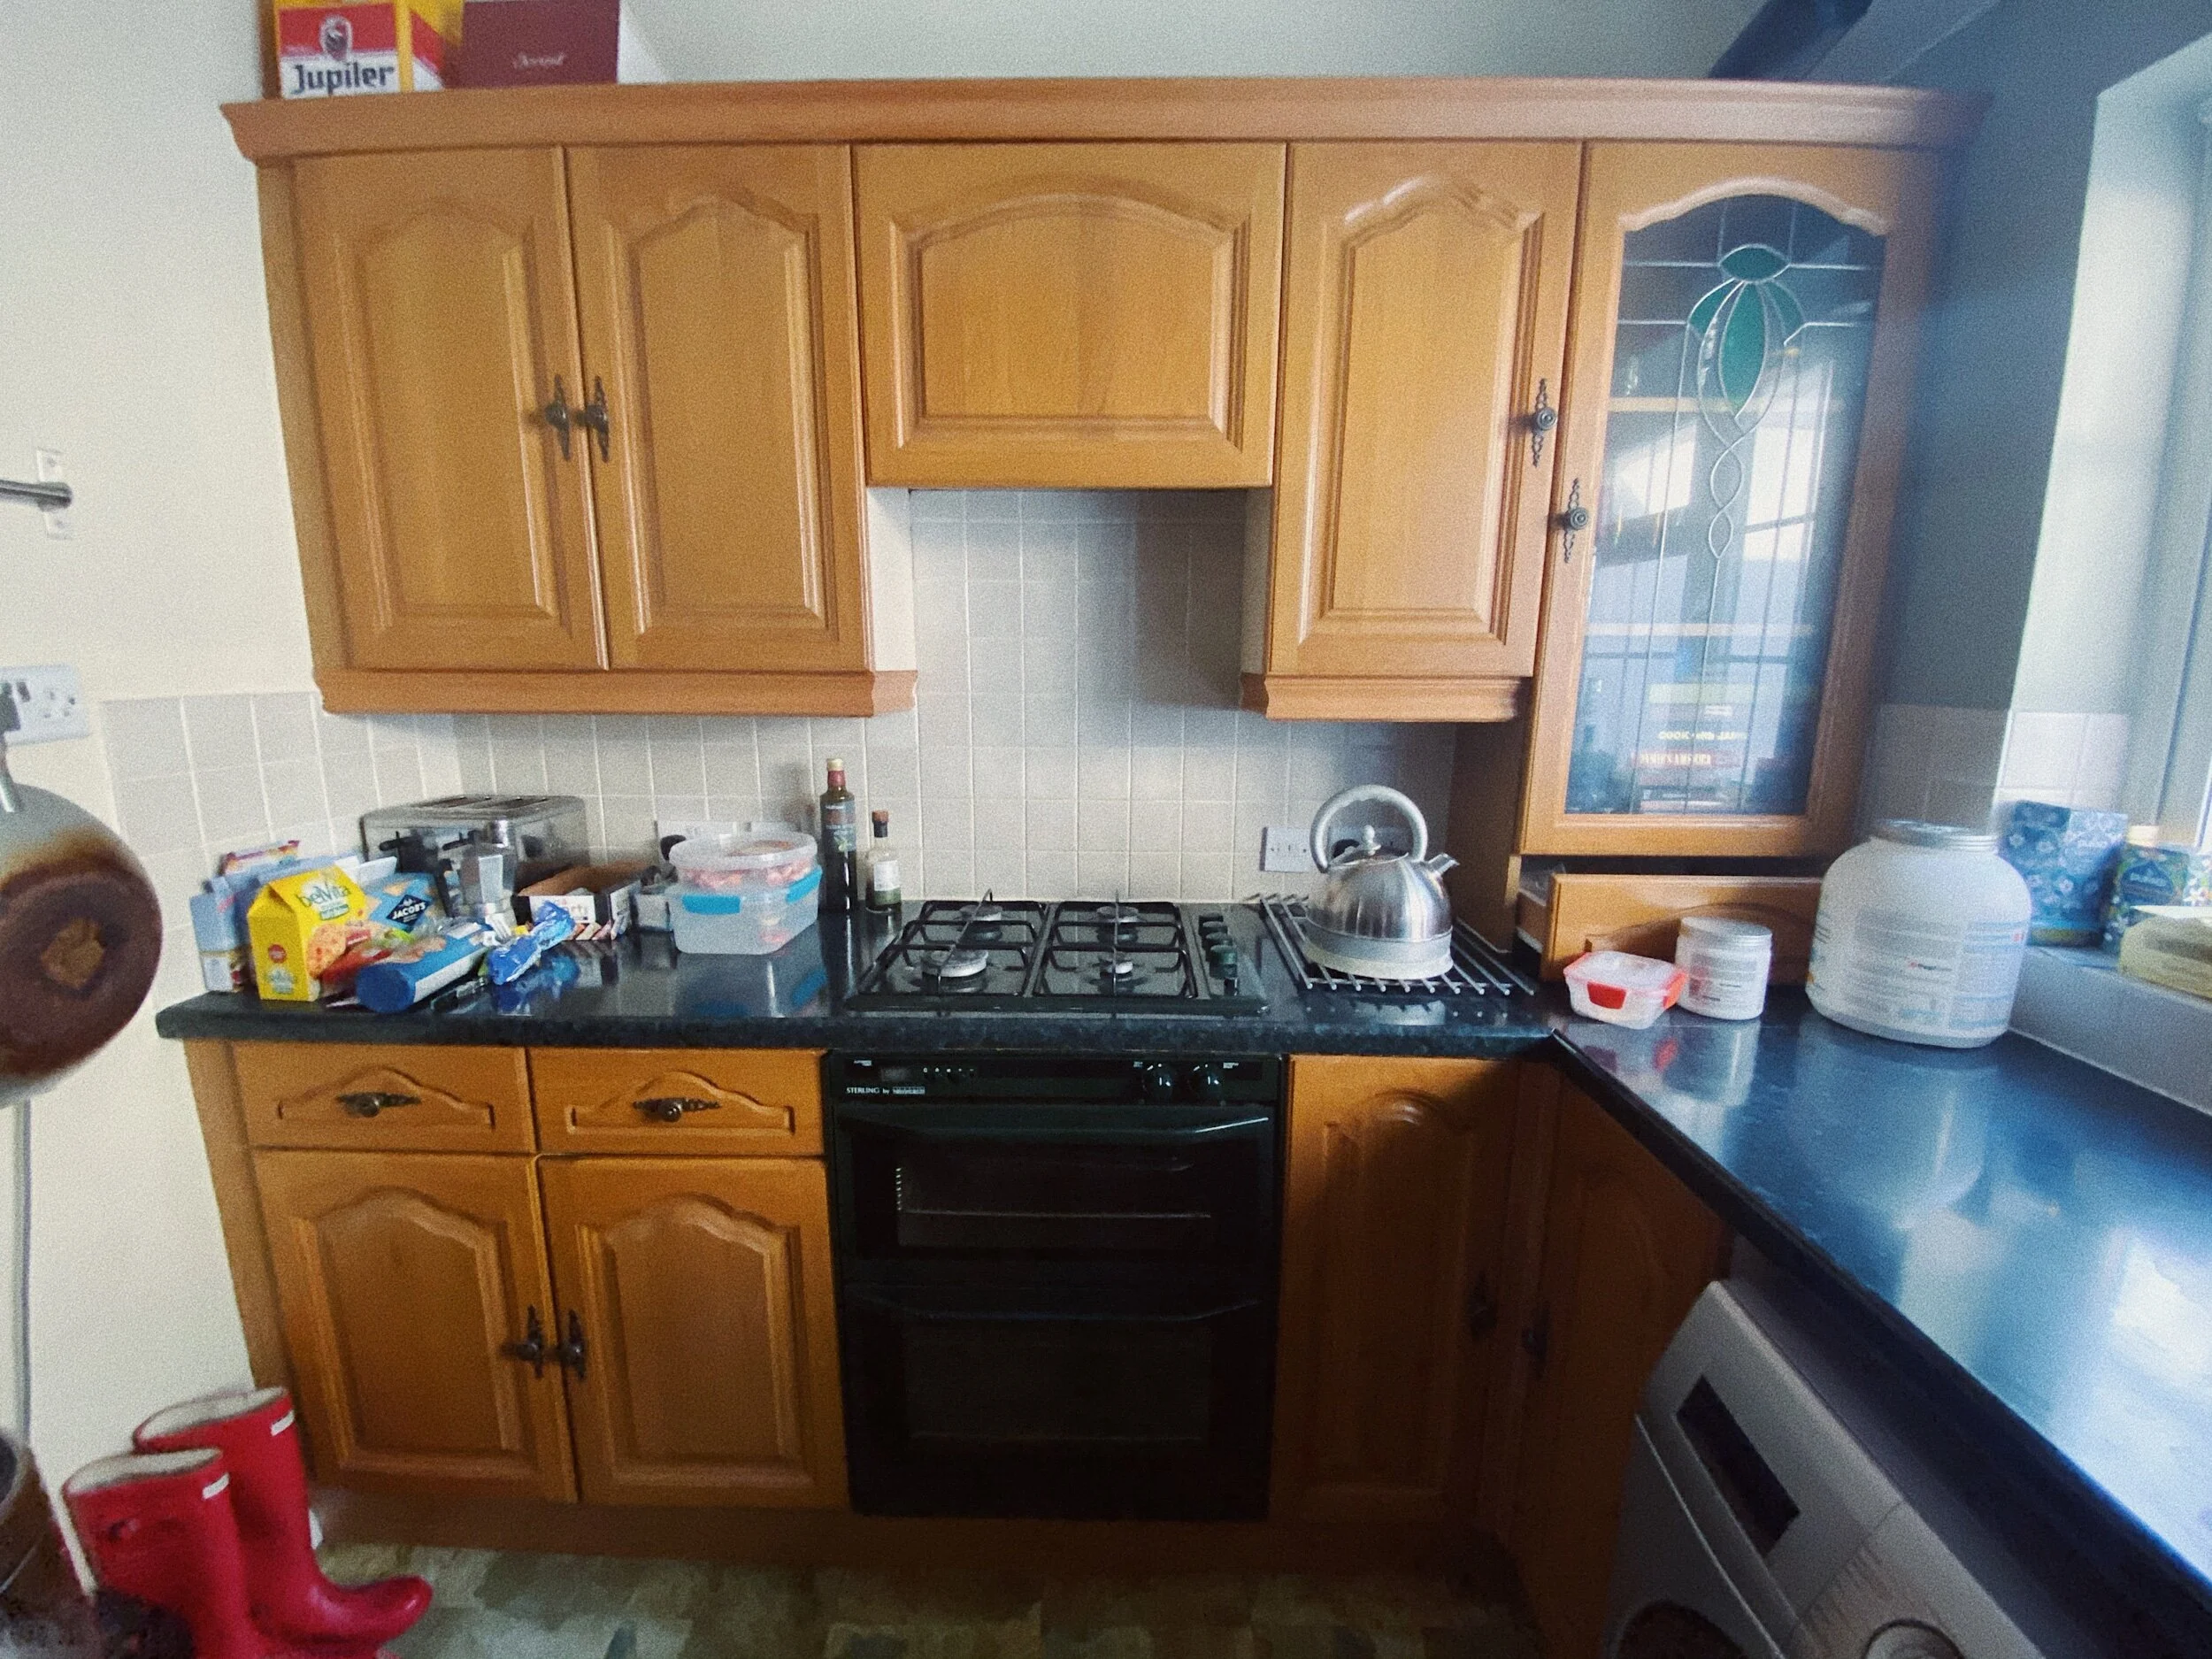
Before: outdated yellow pine wooden farmhouse style kitchen cabinets, magnolia walls and tired-looking beige splashback wall tiles
A home design love story
When I first got with Rob in early 2019, he invited me to stay over at his place one weekend. It’s safe to say, I did not know what to expect upon my arrival. In my experience, a man living on his own, can mean one of two things… An absolute doss house/squat of a place, where neither his kitchen nor bathroom have ever seen bleach… or a pristinely tidy do-not-touch-anything-infact-do-not-even-breathe-or-you-will-break-something type affair…I wondered on at end of the cleaning spectrum he would fall.
Therefore, you could say I was pleasantly surprised to find a single man living in such extremely clean and cosy conditions (he’s more OCD than U.N.T.I.D.Y), and with excellent taste too! Over the last 16 years, since buying his first-floor flat in Surrey, he has undertaken a huge number of home DIY tasks himself, and has done a brilliant job of redecorating his living room, bedroom and bathroom. But when it came to showing me the kitchen, he was somewhat apologetic...
You can imagine my delight at the idea of being unleashed on this old kitchen! I would finally have the chance to do my own mini makeover; I was in my absolute element! You see… for the last 8-years, since moving to London, I’ve always lived in rental properties. Which usually means, do not paint the walls, do not even dare to hang a photo! etc etc. If you are living in rented accommodation, and are looking for inspiration - then do check out Emma Jane Palin, Heart Zeena and The Vitamin D Project for some fabulous interior design inspo I wish I’d found years ago!
Sooo… back to Project Kitchen. It turns out, we work really well as a team. Thank goodness! I wearing my home interiors blogger hat and play interior designer; coming up with all of the creative ideas, art directing, etc, whilst he plays Handy Man. Something that he’s pretty savvy at! Oh I do love a man who can rewire a plug, use a drill and hang a photo frame! We settled into our designated roles and away we went!
We did this kitchen makeover over the space of a few months; stealing moments here and there - in and around day jobs and having a social life. Buying a few things each pay day, to continue the task. I couldn’t wait to see it finished!


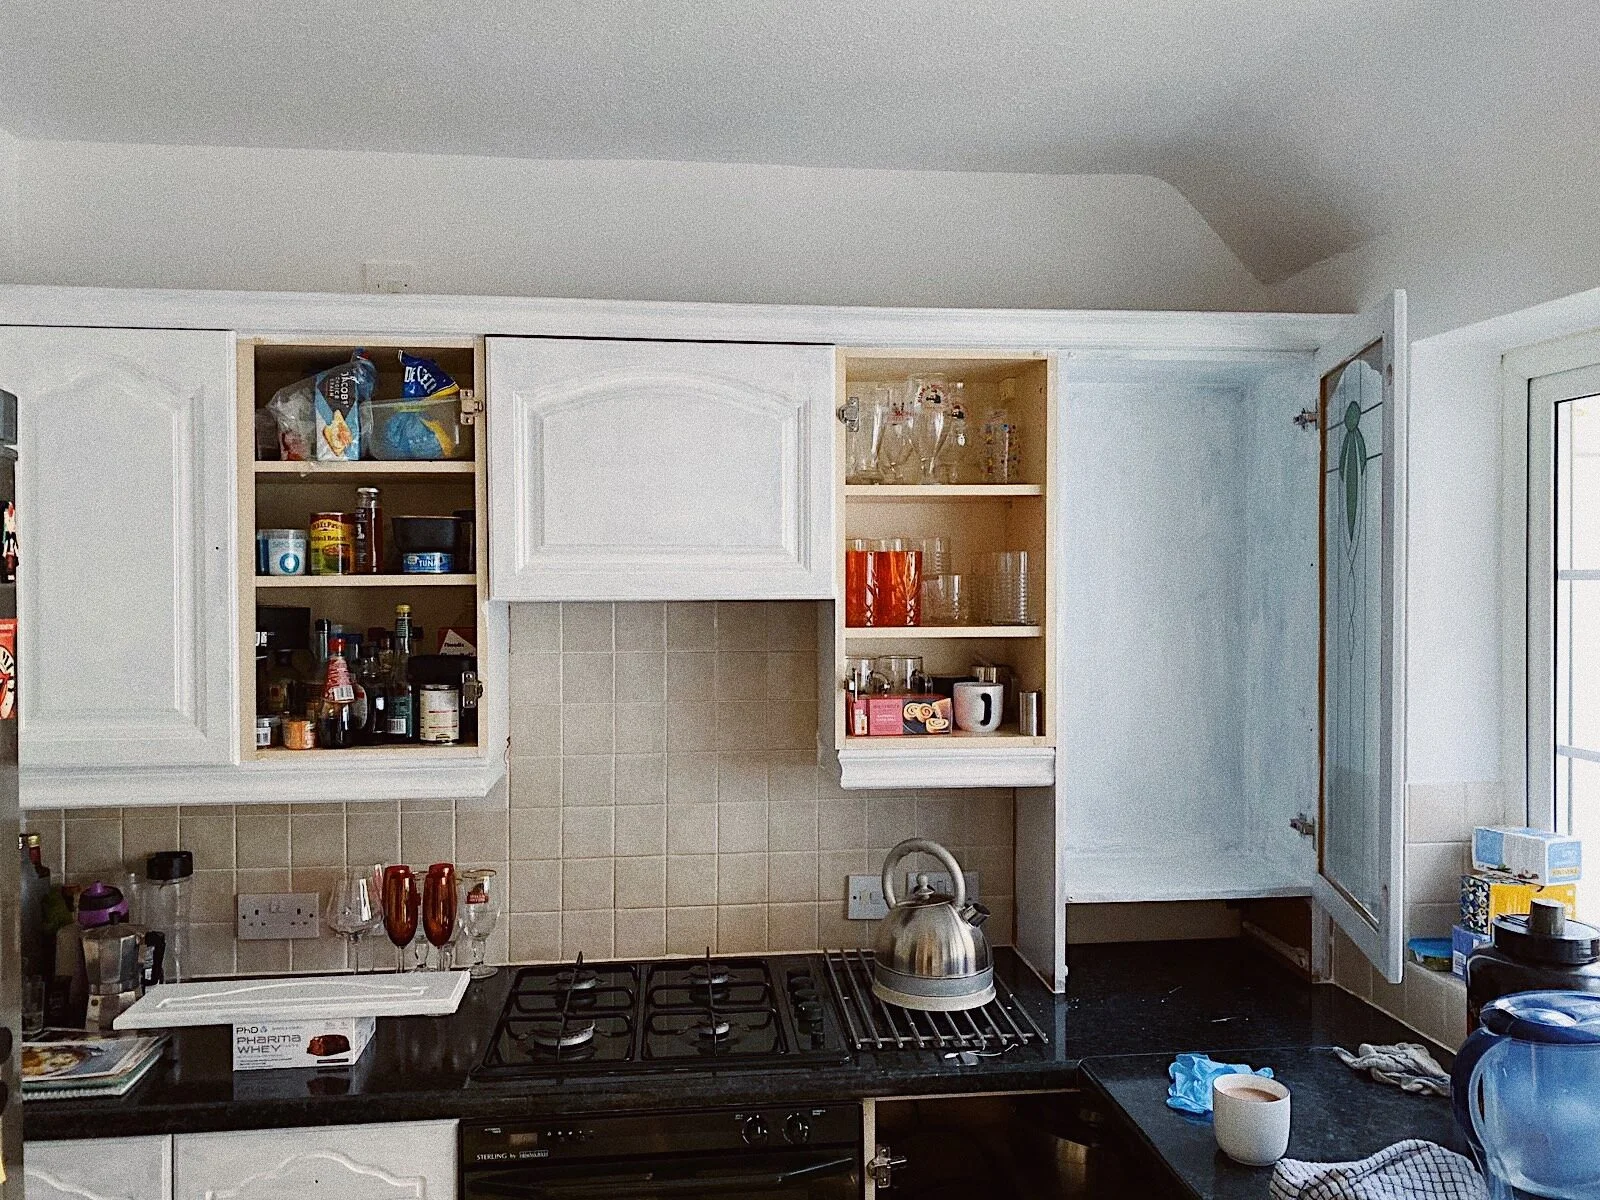
Where to start? Prep any surfaces that you wish to paint
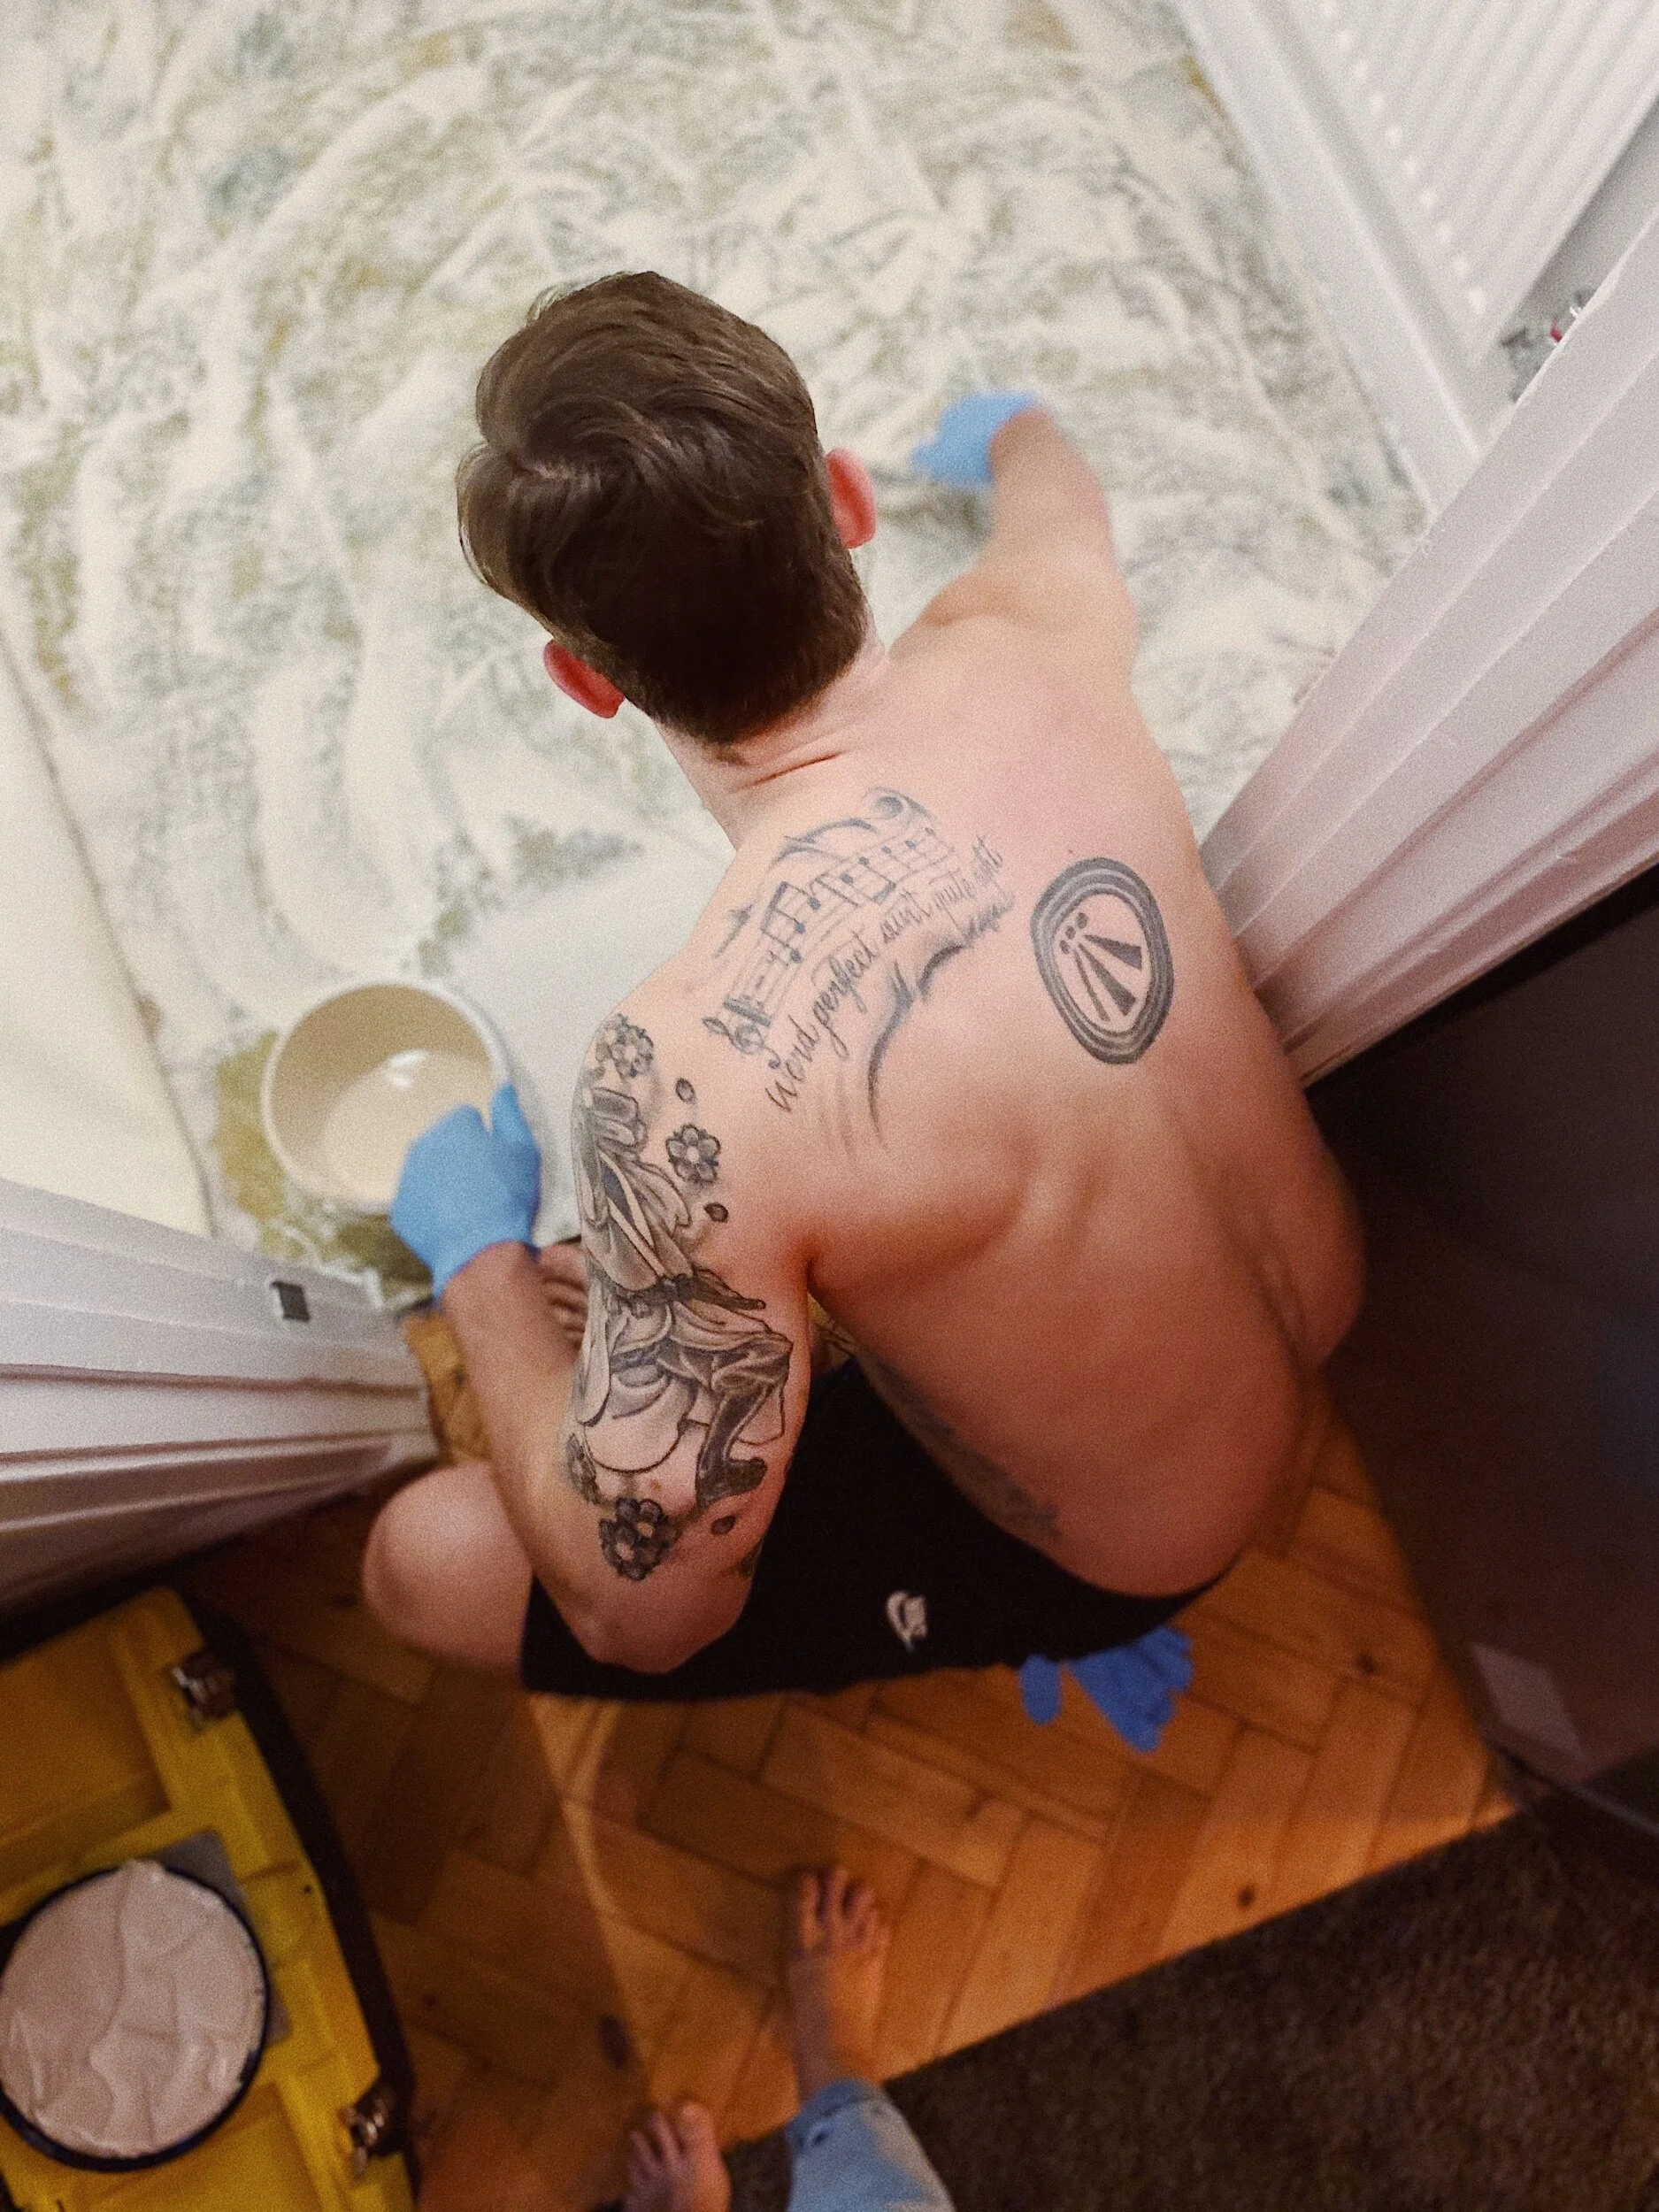
First things first! Clean your cupboards using sugar soap to remove any grease or dirt, before applying an undercoat to the wooden kitchen cabinets that you would like to repaint in your choice of colour. Don’t forget, if you’re not changing your kitchen floor, put down a dust sheet or something to protect your floor from any paint spillages or DIY mishaps!
Warning: repainting your kitchen will give you an opportunity to reorganise/declutter and clean those kitchen cupboards that you’ve been putting off for far too long! It’s cathartic, I promise! Look out for spices that are wayyy past their sell by date! What’s the oldest thing you can find in there?


Accessorise with new colour-coordinated appliances
Have your kitchen appliances seen better days? By choosing a new matching toaster and kettle that complement your colour scheme, you can really lift the look of the whole kitchen. Does your glassware collection need decluttering? We also opted to give any surplus glassware to the local charity shop, to free up space in the cupboard, and be more selective about the glasses we bought in future.
What you need to know before laying a vinyl floor at home…
Measure the floor space, and then measure again! You will be sent a single roll of vinyl pattern flooring, so need to ensure that you have allowed for the little bits that will go underneath your cupboards and kitchen white goods, so that they sit nicely behind the kickboards
Order samples of the styles of flooring you like, so that you can see what they look like in situ and help make your final decision.
Thoroughly brush, hoover and mop the floor surface that you will be covering to ensure that there are no bits that will poke through your new flooring and accidentally tear a hole in it.
When you first lay the flooring out and initially cut it to size, leave an excess around the edge, so that you are not going to cut too much off when you stick it down.
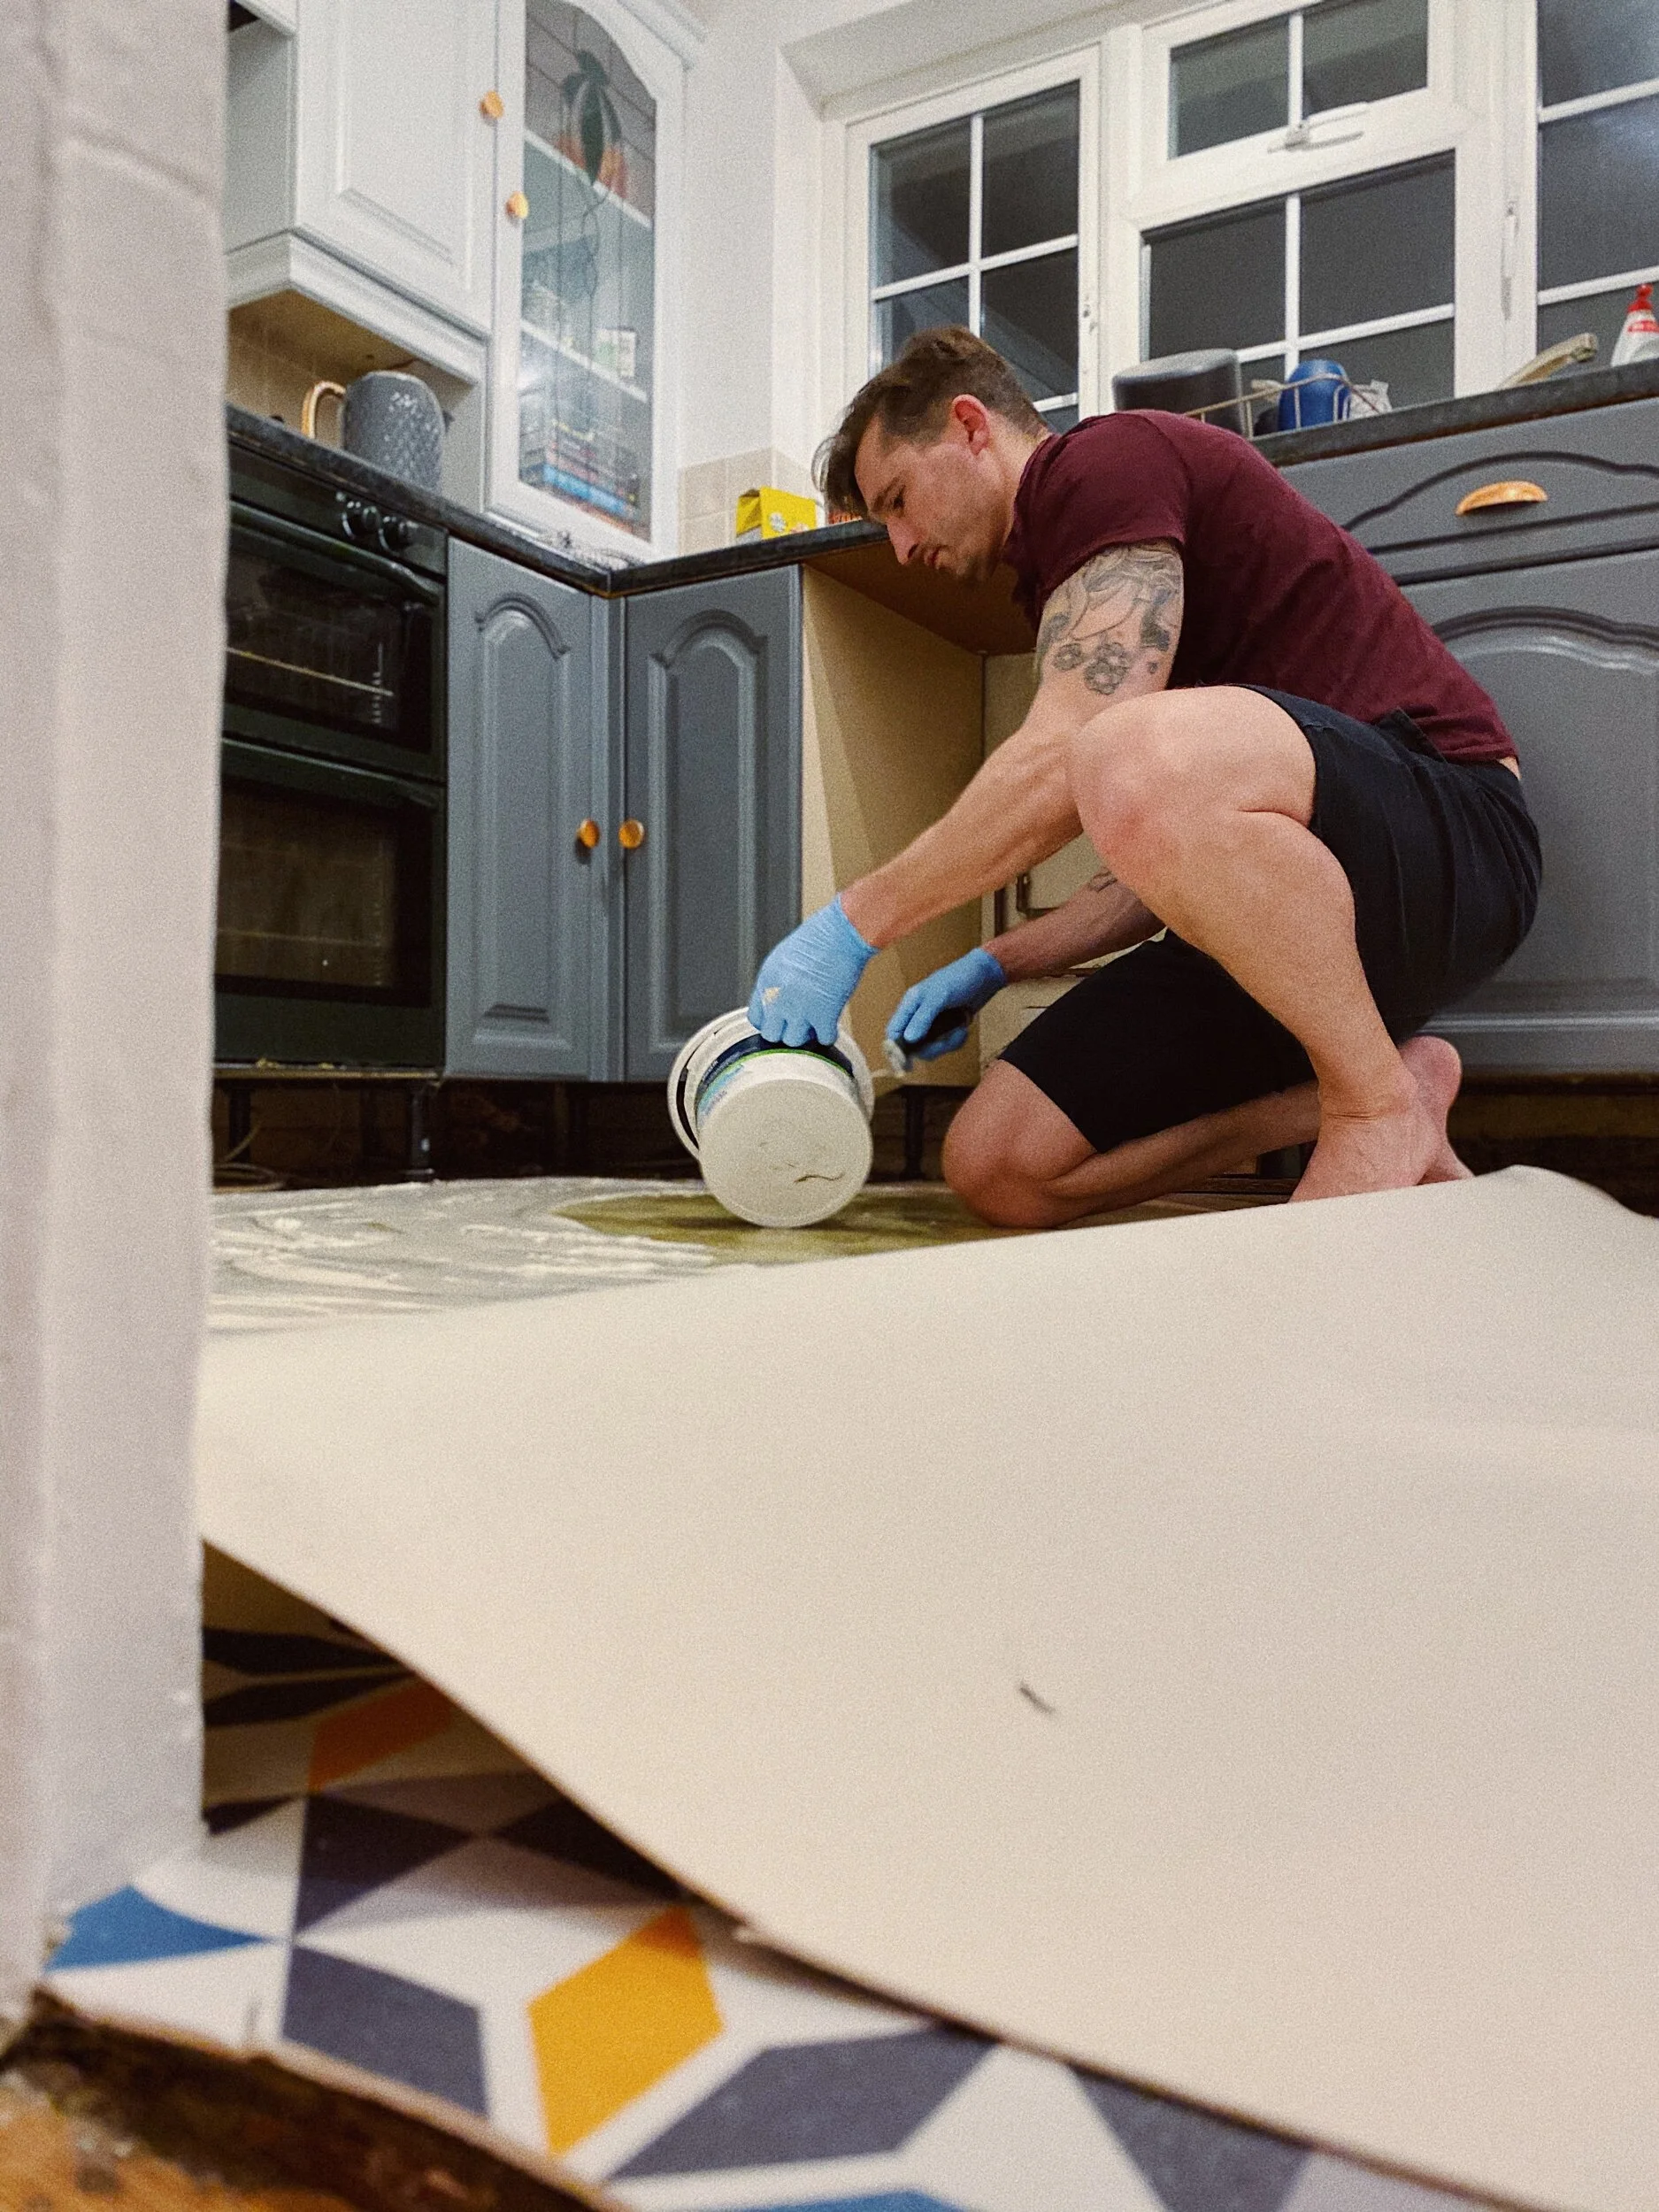
Do half of the floor at a time, so that you have somewhere to stand/squat whilst you are laying your new vinyl flooring, so that you do not get glue all over your feet.
Make sure you get right flooring glue. We bought a tub of vinyl floor adhesive from Screwfix, which worked perfectly.
Ensure you line up your patterned flooring, to avoid it looking wonky and annoying the hell out of you forevermore once in place. Tip": Use the edge of a cupboard door to level it up, and make sure it is straight.
Do not use too much glue - and ensure it is spread evenly, following the instructions on the pot, to avoid any lumpy or uneven bits underfoot once dry.
Be patient! Do not walk on your new vinyl kitchen flooring UNTIL the recommended drying period has elapsed
Do not attempt to move any heavy white goods or kitchen appliances back into place, whilst the glue is still tacky – or you could tear a whole in it - a lesson we learnt the hard way!
When moving your heavy white kitchen goods back into place, use some old wooden flooring planks (if you have any) to rest the feet on, so that they do not drag along the new flooring. This will allow you to manoeuvre it into place more easily. Ask a mate to help you, if the items are really heavy, so you don’t a) put your back out or b) ruin your new floor.
Buy a silicone tool, to seal the edges or the floor, and give it a crisp clean finish around the edges. This can also help to stop any water from going underneath the vinyl flooring when you come to mop it.
Ensure you have enough time to do the job - this size floor took around 2-hours to lay - our kitchen floor is 3m x 2m.

Wondering how to lay a patterned vinyl floor covering yourself at home? Be sure to do your research first!


Please be sure to read the list of things you should know before laying your own vinyl floor!

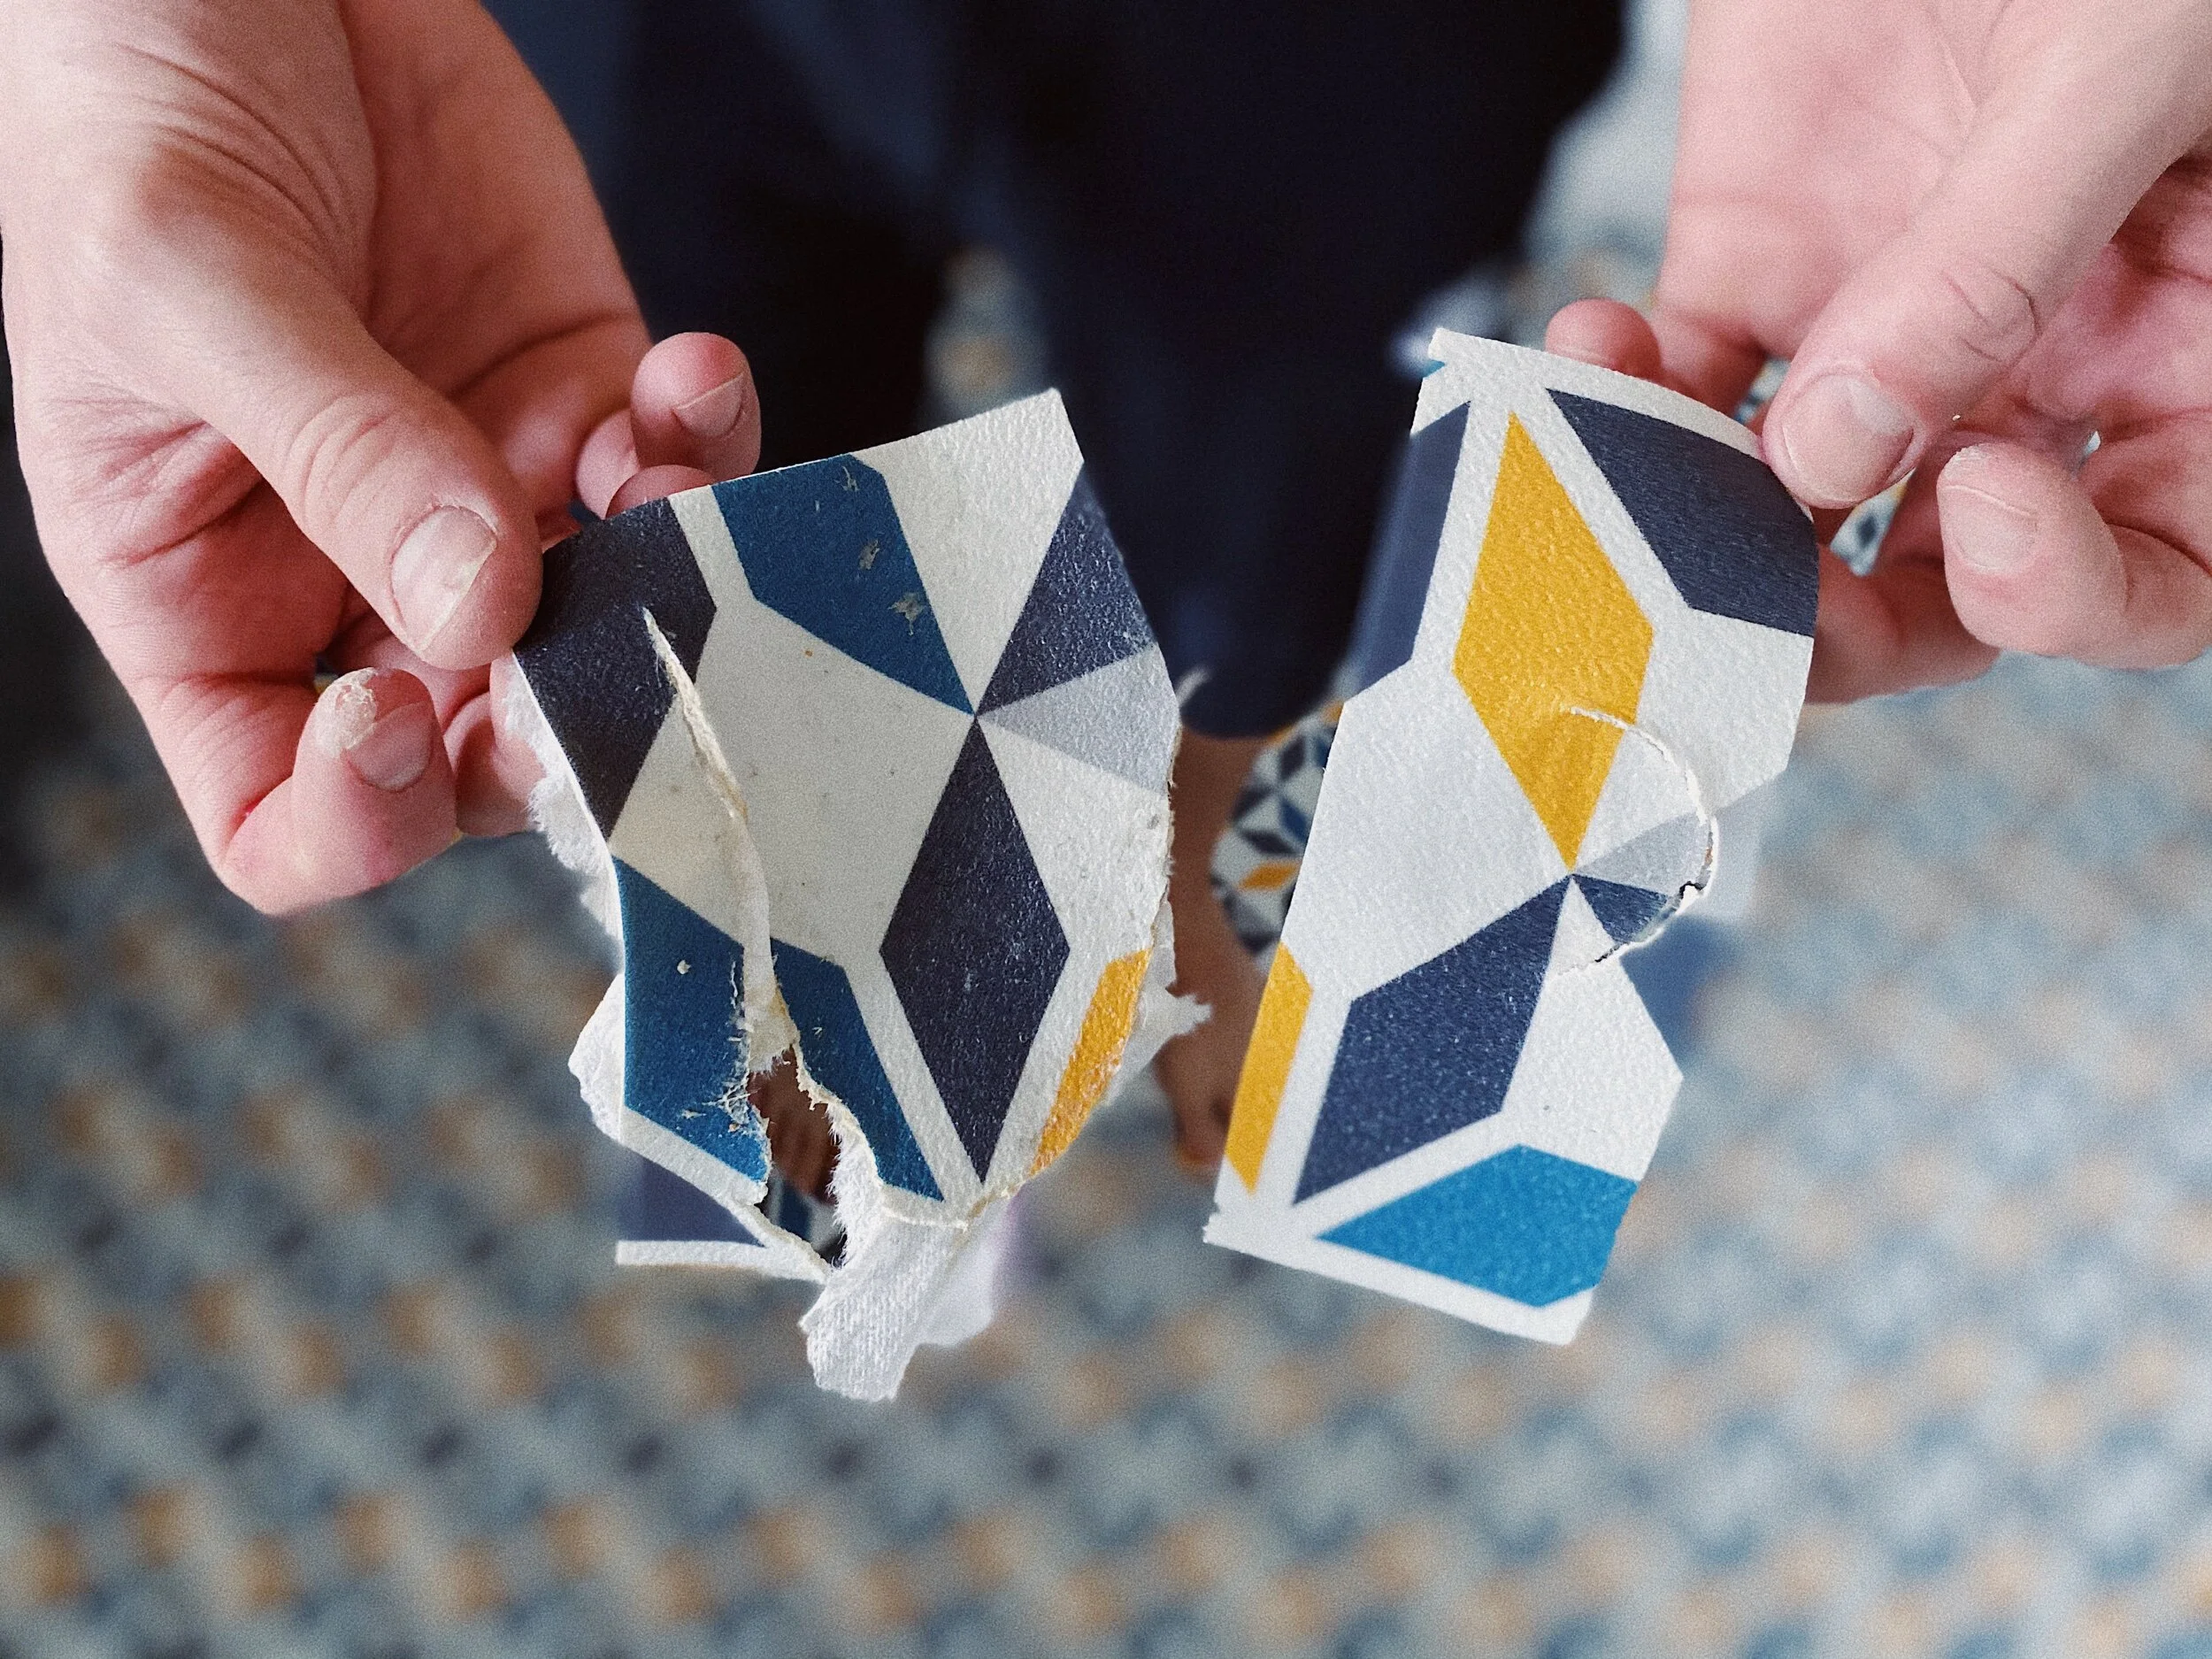
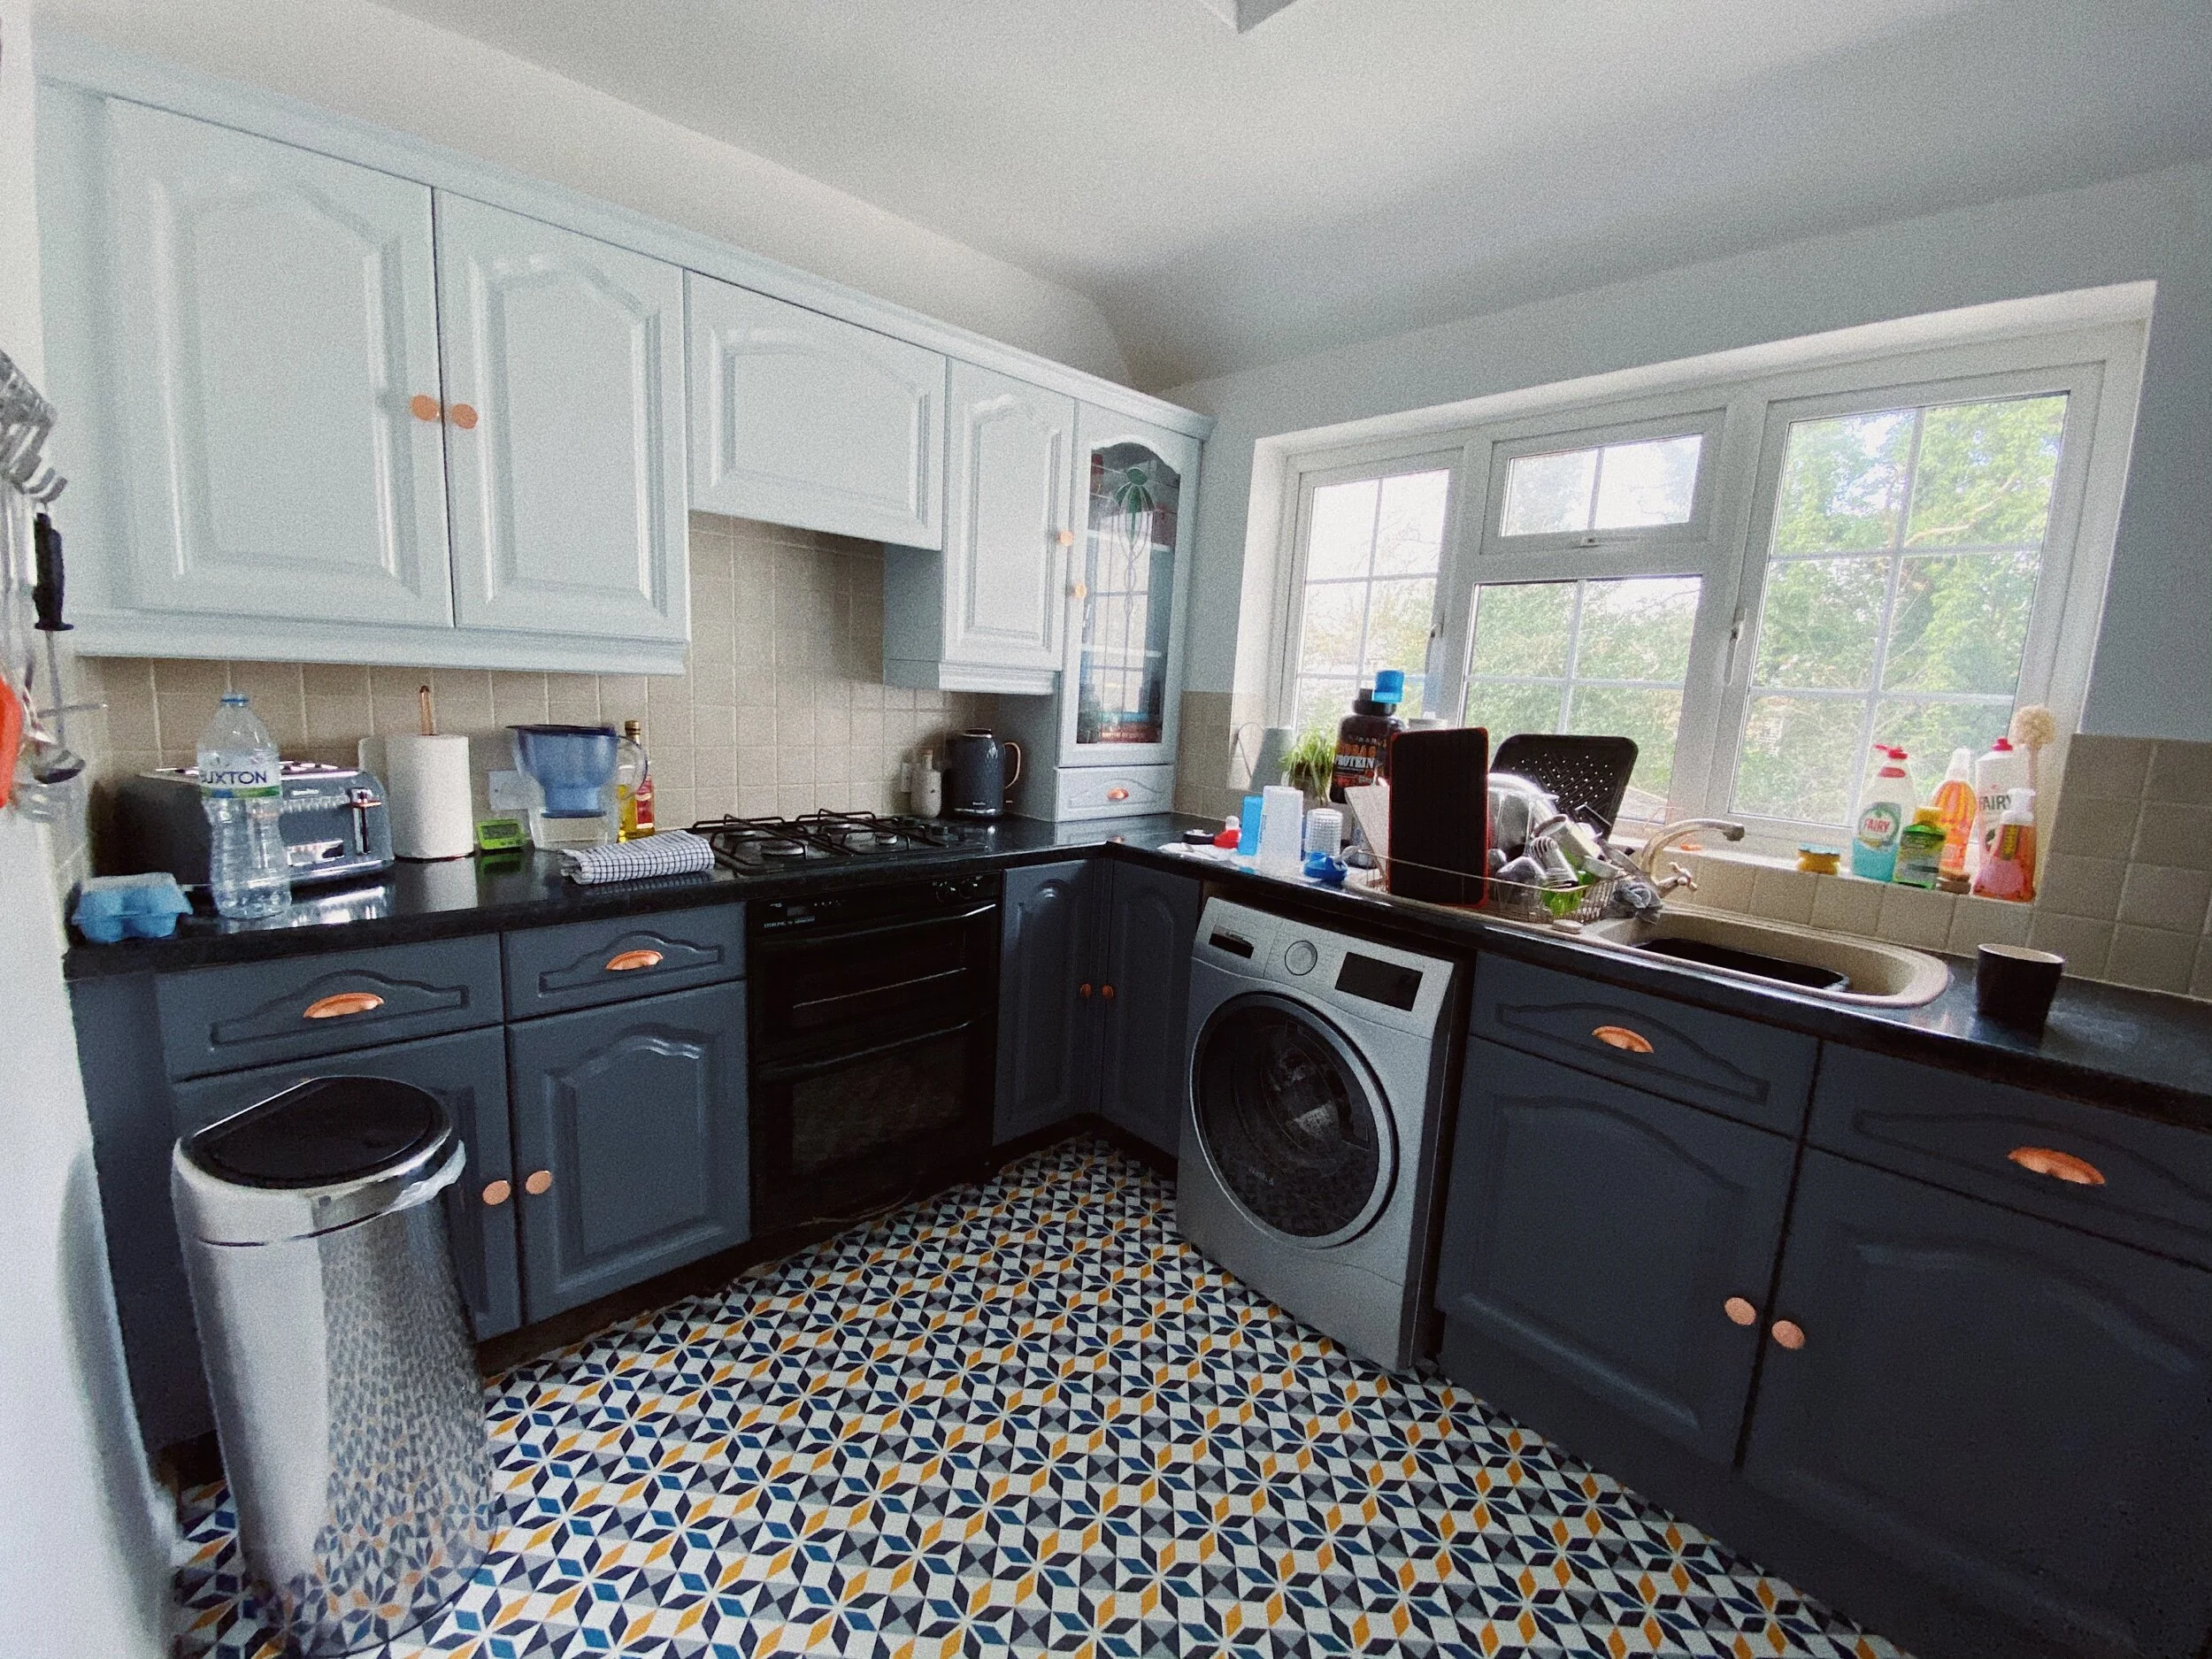
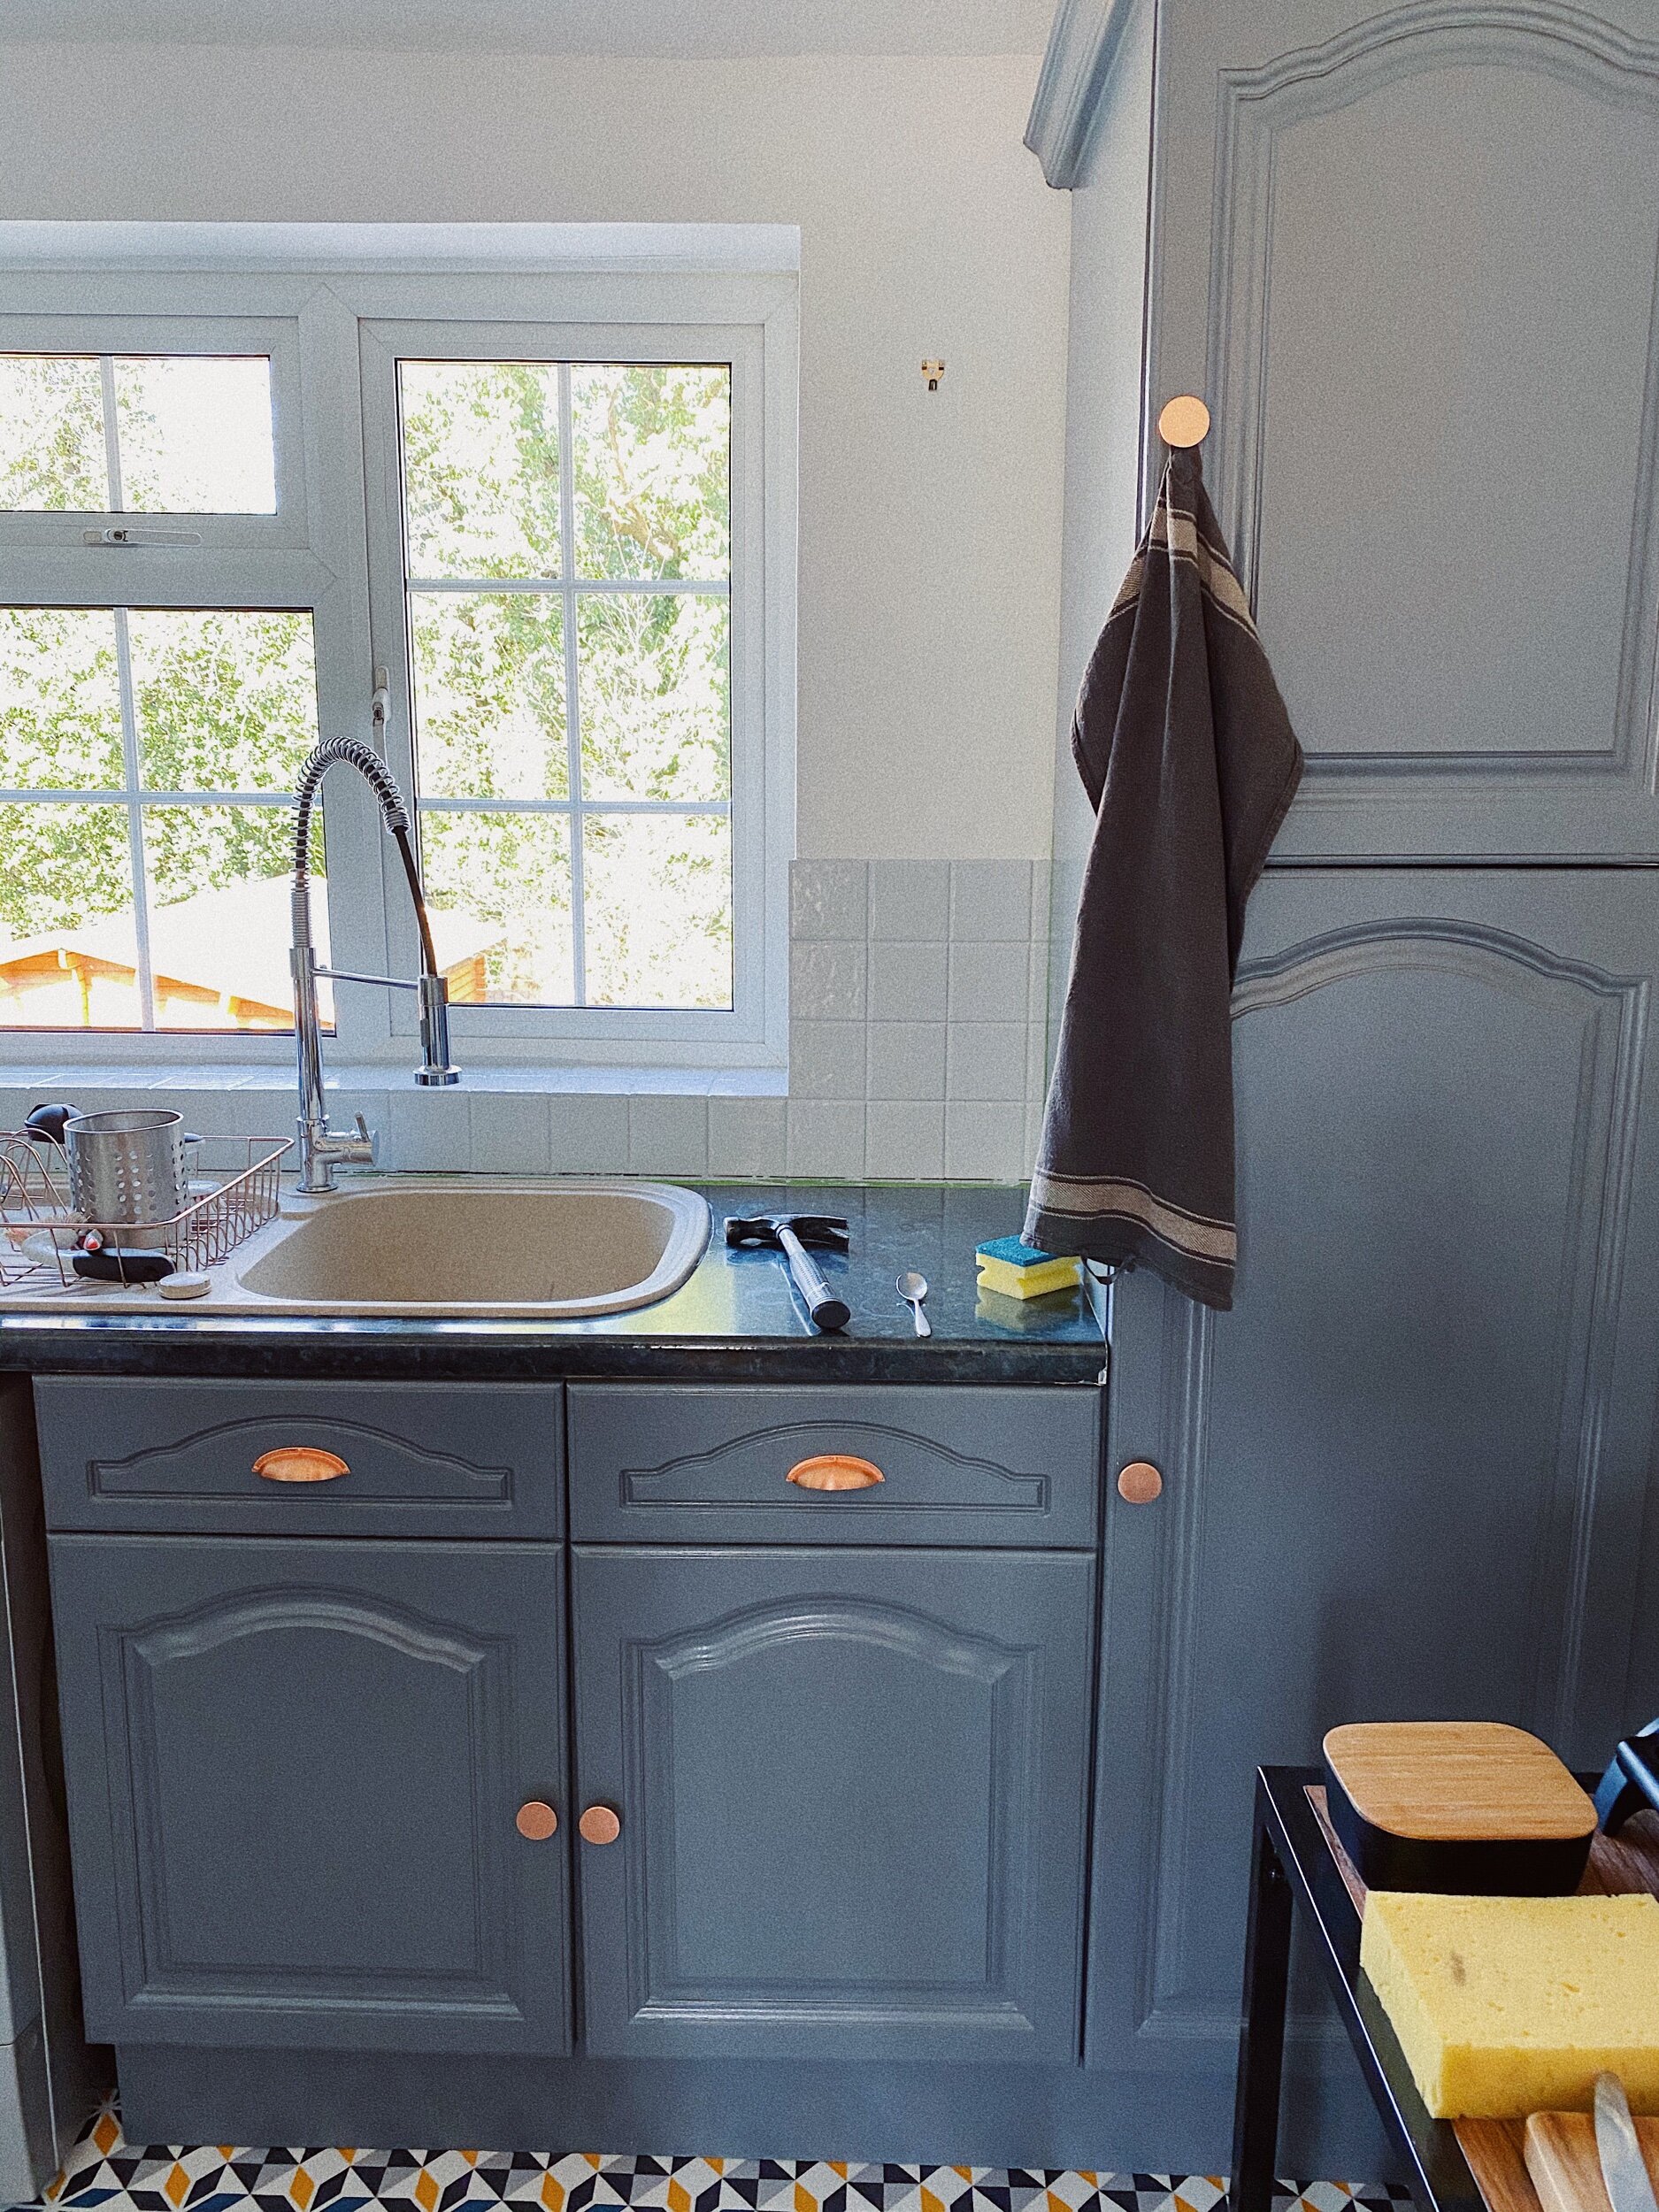
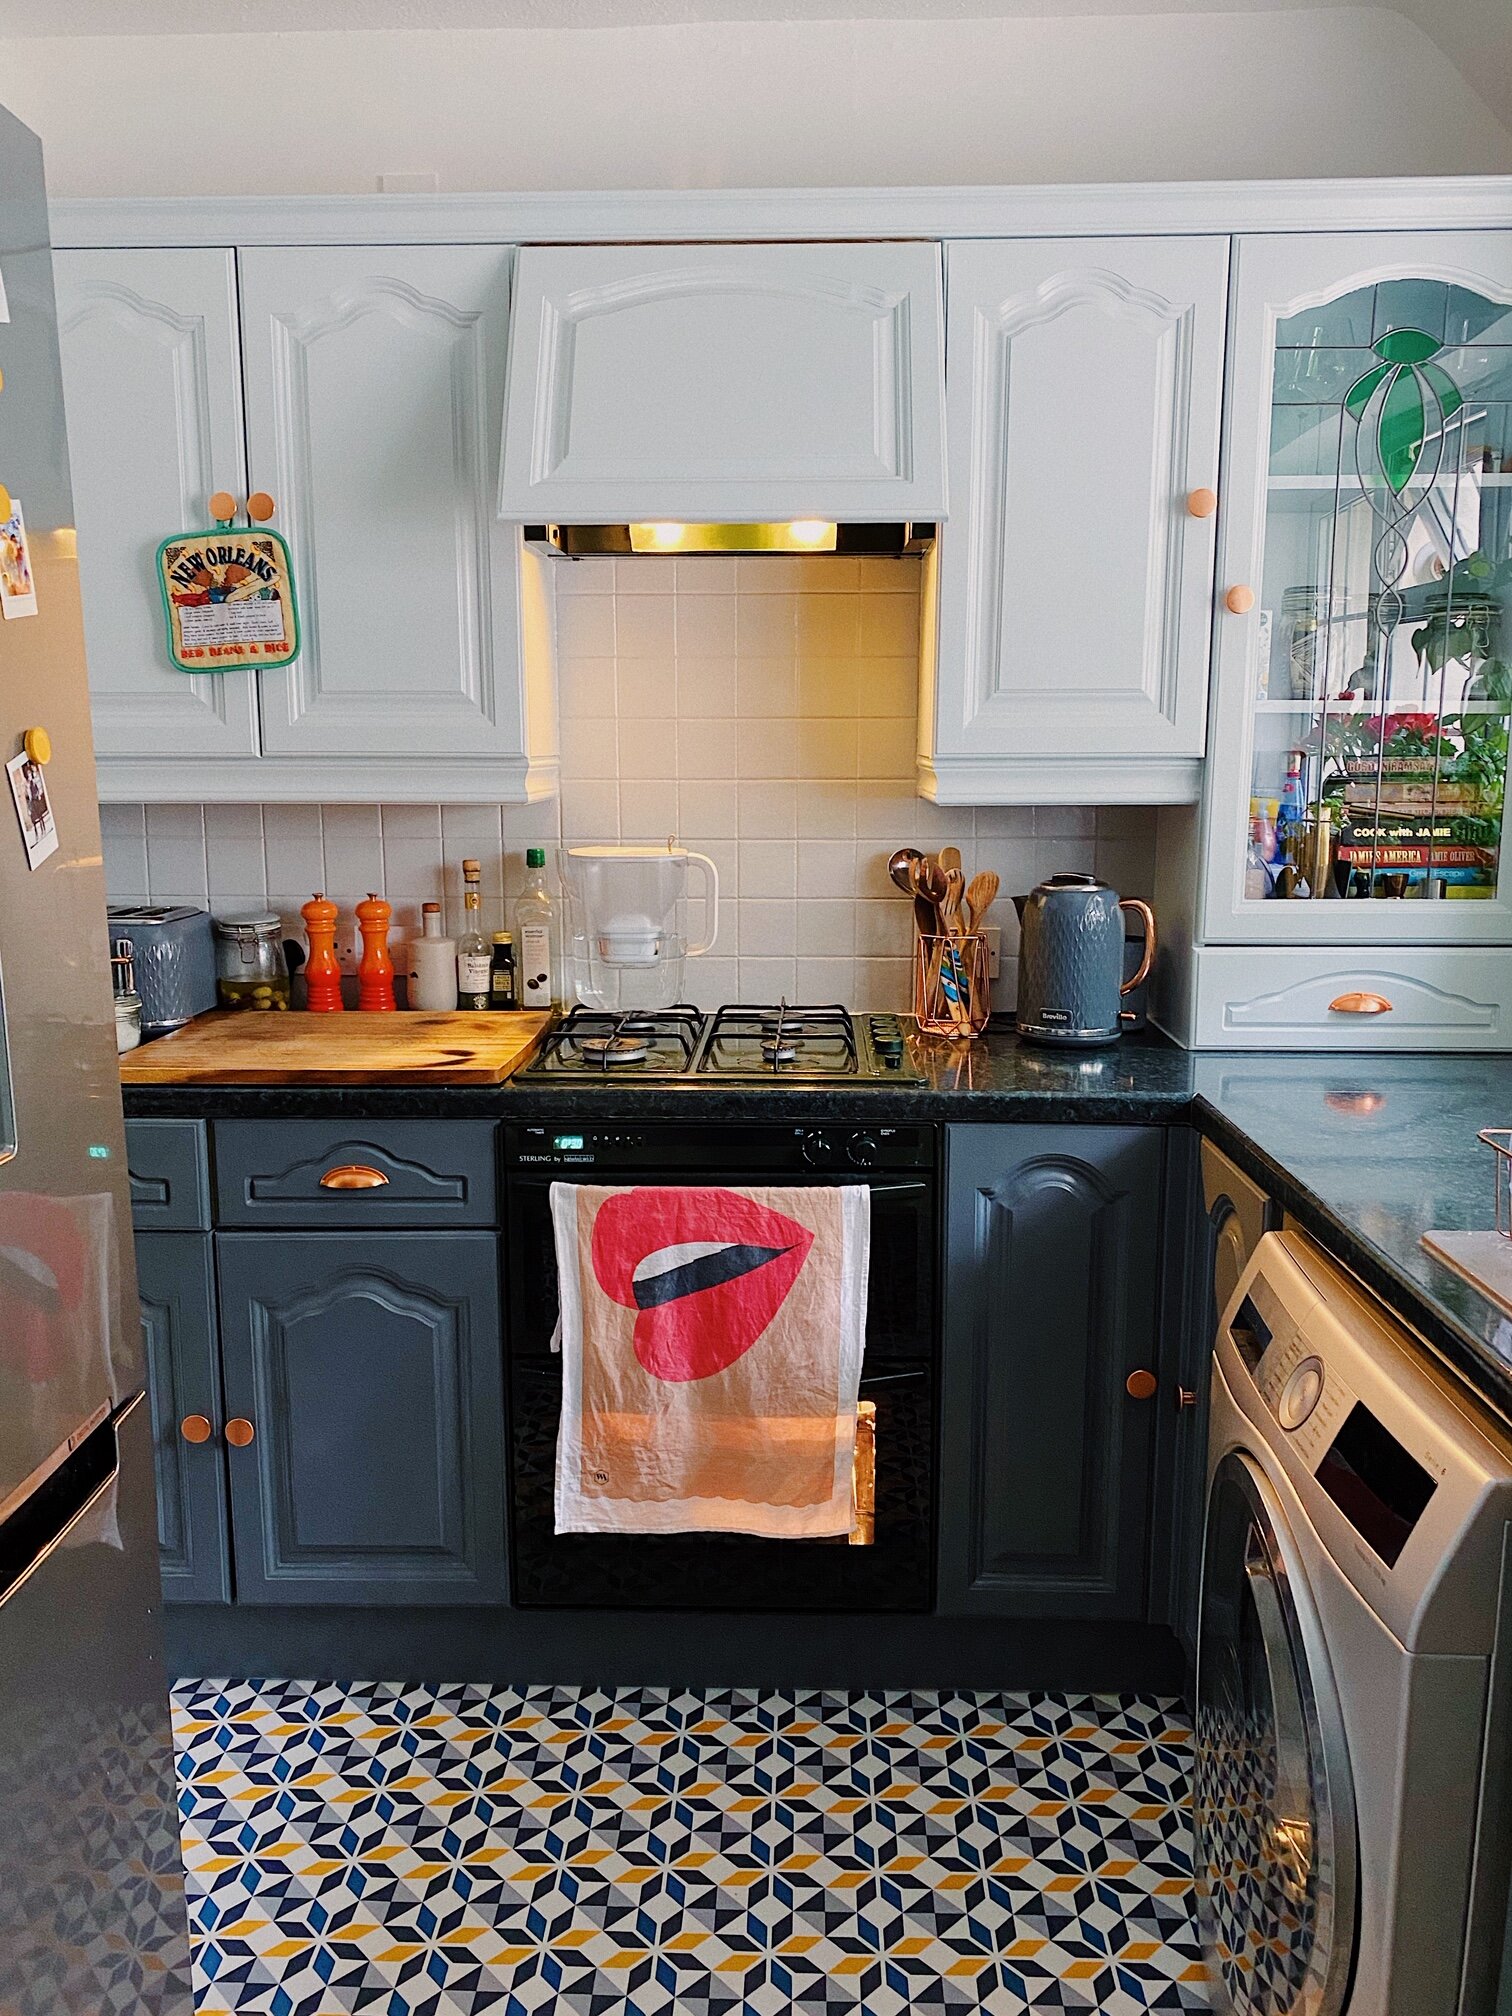
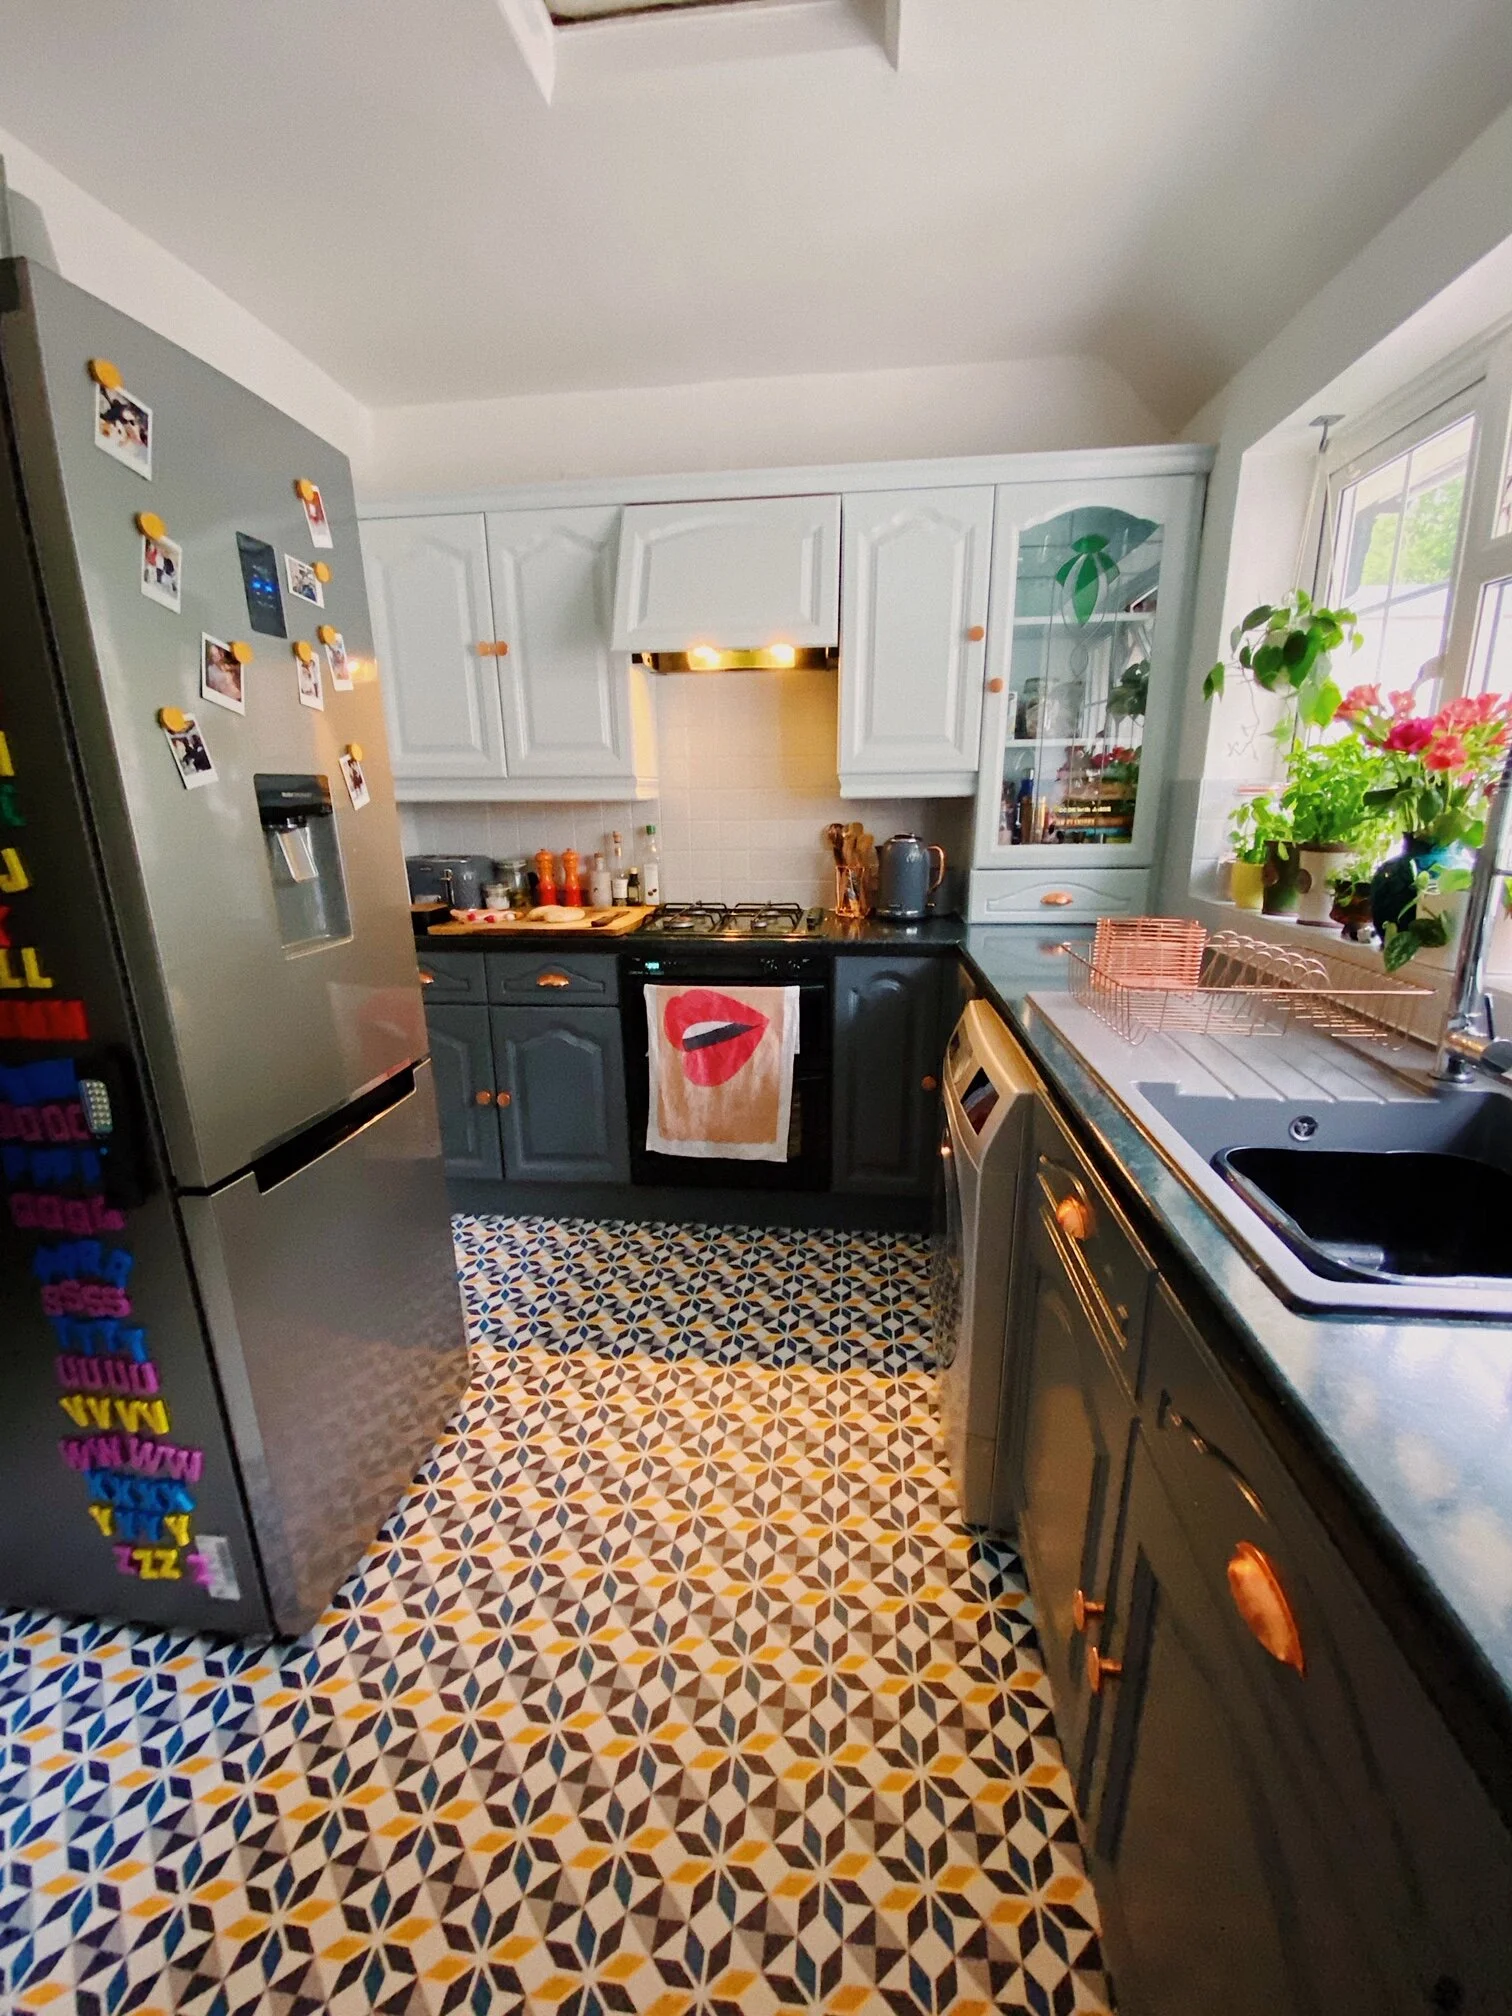
Our kitchen showstopper is definitely the Geo: Dora vinyl flooring - gifted by For The Floor And More - it gets a lot of love from friends & followers on my Instagram
Light it up!
The new Industrial spot gray concrete 3-lights from lampandlight immediately make the room look much more modern. We just need a new loft hatch and ladder fitted now! We’ve also recently purchased a few Philips Hue bulbs for every room in the house and they are so fun! They work with an Amazon Alexa, so are voice activated and perfect for setting the mood. (We haven’t done the bathroom, as I think the roof cavity might be too shallow?)

Industrial spot gray concrete 3-lights from lampandlight


The joy of those funny coloured magnetic letters for the fridge!
Halfway point! Still to do: paint those kitchen tiles, replace the old kitchen sink, add a few plants and finishing touches!

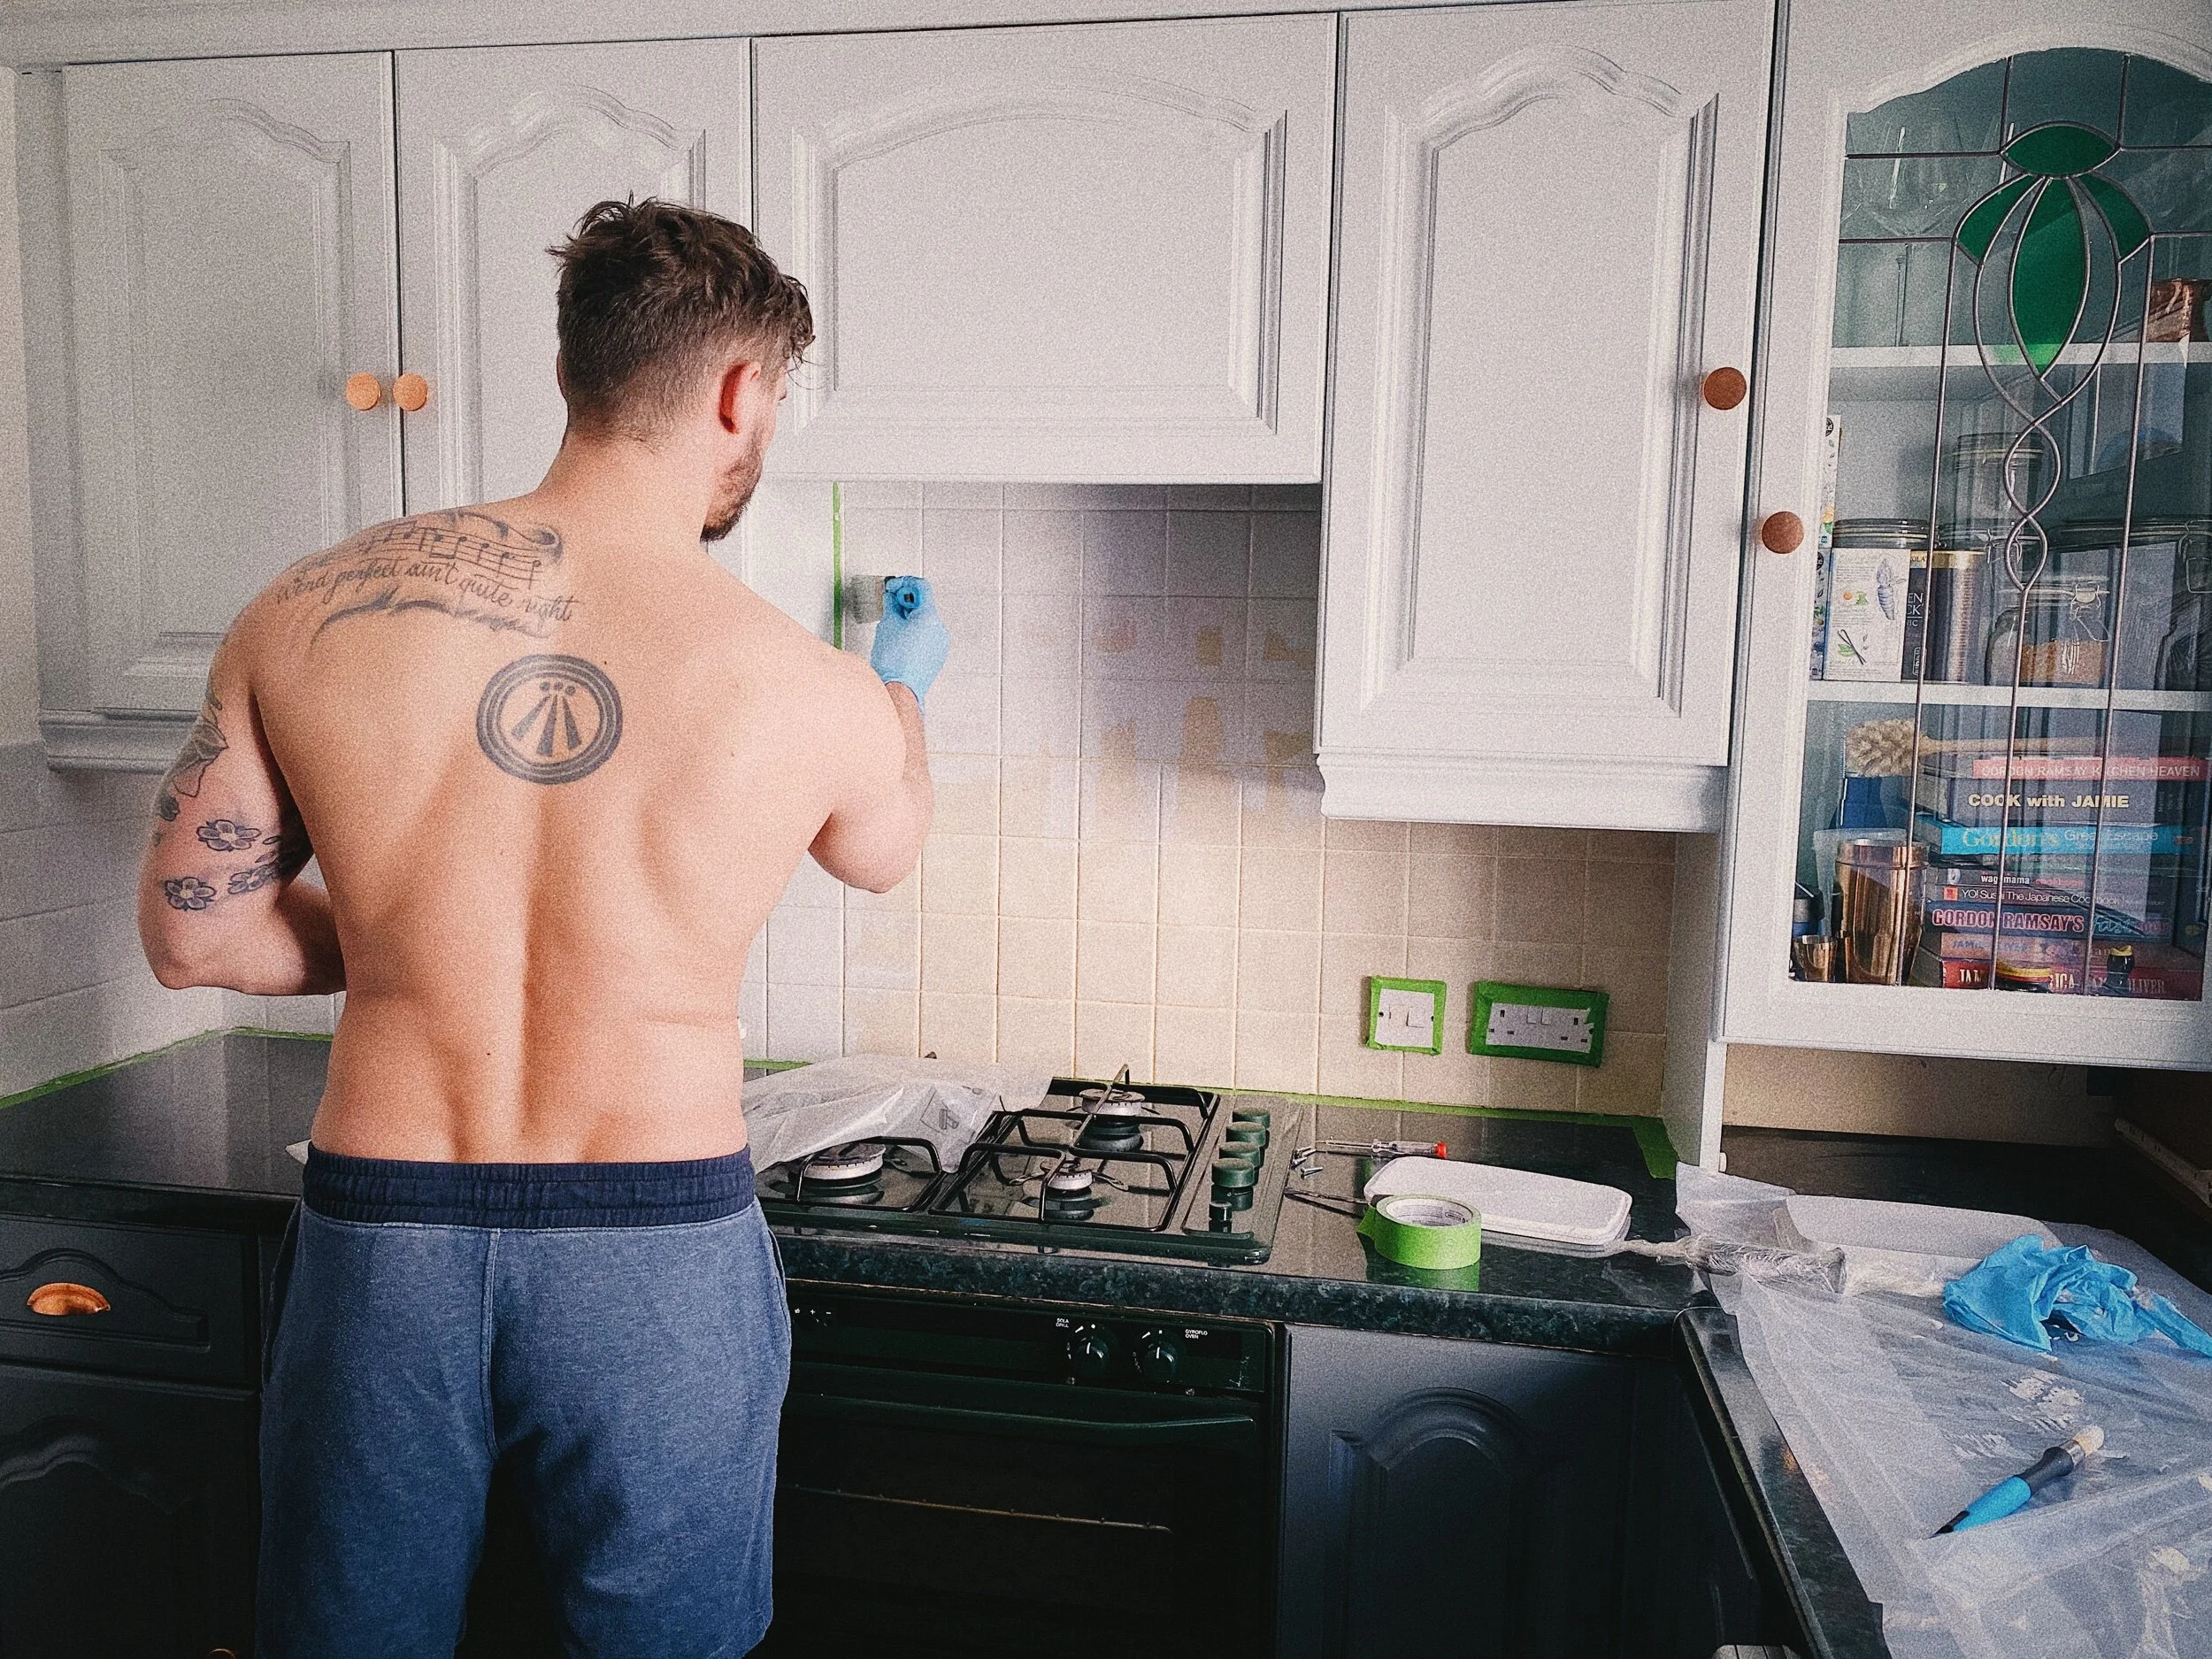
Can’t afford to remove and retile your kitchen? Try painting them! We bought this big tub of pale grey tile paint from B&Q and after wiping down the tiles with sugar soap first, and masking off edges, two coats later and it made the whole kitchen look so much fresher!
Top small kitchen tip: Make the most of every available surface & get organised, Create a chalkboard!
I’d had the idea of doing a chalkboard wall in my head for a while. It turns a boring kitchen cabinet into something far more functional. We bought a tin of chalkboard paint, lightly sanded the newly painted kitchen cabinet surface, and applied two coats of chalkboard paint (leaving them to dry between coats) to turn it into an old school style blackboard. Note: If you buy those fancy chalk pens off the internet, you will need some sort of Windowlene to remove them, if you want to update your notes. I decided to use the chalkboard pens for the headings and dividing lines only (e.g. Coming Up, Menu, Shopping reminders and a To do list), and then use the pack of Crayola chalk we had bought, to write lists and memos that could be easily erased with a duster or water + sponge only.

For my 30th birthday I treated myself to an assortment of pretty dinnerware: side plates, bowls and dinner plates in gorgeous patterns and colours from Anthropologie. Mismatched crockery is my bag! The little vintage blackbird pie funnel is a cute gift idea too for any keen bakers or pie lovers!
The kitchen makeover is coming along nicely. All we need now are a few finishing touches like tea towels… art.. Oh! and maybe a new sink to match the new grey theme. This beige sink is way past it’s best!


We intend to put kitchen shelves on the main wall and around the top of the room, to store Mason Jars, etc. The Lovely Day for a Guinness print was initially in the spare room, but I think it looks great in the kitchen and adds a nice pop of colour!
After! The big reveal for our small kitchen makeover…


Our small kitchen makeover shopping list:

Now we’ve finished all of the hard work, the fun starts! Time to select a few fun and colourful things (or tasty bottles of Paul Smith x Sipsmith Gin) to accessorise your new look kitchen.

Paint: V700 premium blend Wood & Metal paint in Grey Shingle & Pond Frost - gifted by Valspar Paint and Undercoat. Very happy with how the paint went on, and the finished look!
Tile paint - V33 Renovation White Satin Wall tile & panelling paint, 2L - B&Q - £36 (Priced at 1L - £25 or 2.5L - £34)
Reginox Harlem Grey Sink - Tap Warehouse - £149 was £299.98
360 Spring Pull Swivel Tap - see similar here on eBay - £28.49
Flooring - Geo: Dora Patterned Tile Vinyl Flooring - gifted by For The Floor And More, from their classic collection. Priced at £48.00 / sq m inc VAT - Absolutely love the new floor! It’s now the favourite part of the kitchen!
Copper effect kitchen dish drainer - Wilkinsons - £5 (we think this is a great price, but have seen one called NEVIN, which is a brighter shade of copper, on Habitat for £8, and so are thinking of replacing this one with that! )
Copper Sink Caddy - Amazon - £5.99 (this has suction pads, but they wouldn’t stick to the painted tiles, so we decided to remove them and drill little hooks into the wall to attach it more securely instead)
Breville Curve Toaster - Currys - £34.99 (was £79.99)
Breville Curve Jug Kettle - Currys - £34.99 (was £79.99)
Le Creuset Salt & Pepper Pots in ‘Volcanic’ - John Lewis - £32 each
Fridge freezer - Samsung - approx. £400 (this wasn’t a purchase we’s intended to make anytime soon, but the other Samsung one was 16 years old and decided to break down in the first week of lockdown, much to our horror! Cue: sheer panic!)
Plants: Pothos, Satin Pothos - Petersham Nurseries, Richmond - various prices
Herbs: Basil, Rosemary, Parsley & Mint - Waitrose - various prices
Light fitting: Industrial spot grey concrete 3-lights - lampandlight - £67.95
Philips Hue Lightbulbs - we’ve now got these Philips Hue lightbulbs fitted in the kitchen, bedroom, living room, spare room, porch light and lamps all over the flat. They are perfect for creating a mood and making your home feel more cosy - approx. £125 for three GU10 kitchen spot Philips Hue light bulbs (not shown)
Kitchen Art Prints - Lovely Day for A Guinness print - see similar here on Etsy, Formula 1 print, was an old birthday card that we framed and 10p a Fight postcard by an artist whose name I can’t remember! Eek!
Tea towels - Bunch of Stems set of two by Orla Kiely at John Lewis - £16 and ‘Talk Dirty Dishes To Me’ - W.A Green - £8
Kitchen cupboard handles: brushed copper (rose gold) 12 x round handles and 5 x cup pulls - eBay - £38 total
Total spend around £1,100*, which includes the £400 spent on the replacement fridge freezer, and us splashing out on those pricey but very cool Philips Hue bulbs.
(* Note: that’s without the cost of paint or flooring - as we were gifted those. If we had included the cost of them, the total spend would have been around £1,500. )
Need some kitchen or home inspiration?
Check out my Kitchen Makeover board on Pinterest to see where I got the inspiration from for our own kitchen makeover. If you are unsure how to use Pinterest, take a look at this handy Pinterest guide.
Thank you so much to the lovely people at Valspar Paint & For The Floor And More for helping us to achieve such a great before and after kitchen transformation.
If you are a brand and would like to collaborate with us on a home renovation project, please get in touch. The next project ideas on our wish list are a living room revamp with new velvet green sofa, a home office/art studio space, a Miami beach themed balcony and a garden wilderness transformation.
Follow me on Instagram @LucieLoves
Photography © Lucie Kerley